Guide to Managing Devices

Photo by Matthew Kwong on Unsplash
In managing the devices enrolled with the Entgra IoT server, it is important to set the general platform configurations to the frequency that the server needs to be monitored. Instructions for general platform configurations are given here.
Managing devices section guides you on how to group enrolled devices, share the groups specific to user roles, and to update and remove groups when required. This section also takes you through on how to monitor the device status.
Also covered within this section are the Policies for Android, Apple and Windows devices. Procedures on How to Add, Update, Publish/Unpublish and View a policy enforced on a device are given. It is also possible to manage the priority order of the policies on a device.
Device operations that can be executed on Android, Apple and Windows devices via Entgra IoT server have been explained separately for each device type. Similarly, device policies that can be enforced on each device type are shown under Android Device Policies, Apple Device Policies and Windows Device Policies.
Device Management documentation available here guides you completely on how to effectively manage your device with the Entgra IoT server.
Given below are the procedures and detailed explanations in managing your devices and of operations and policies applicable to each:
General Platform Configurations
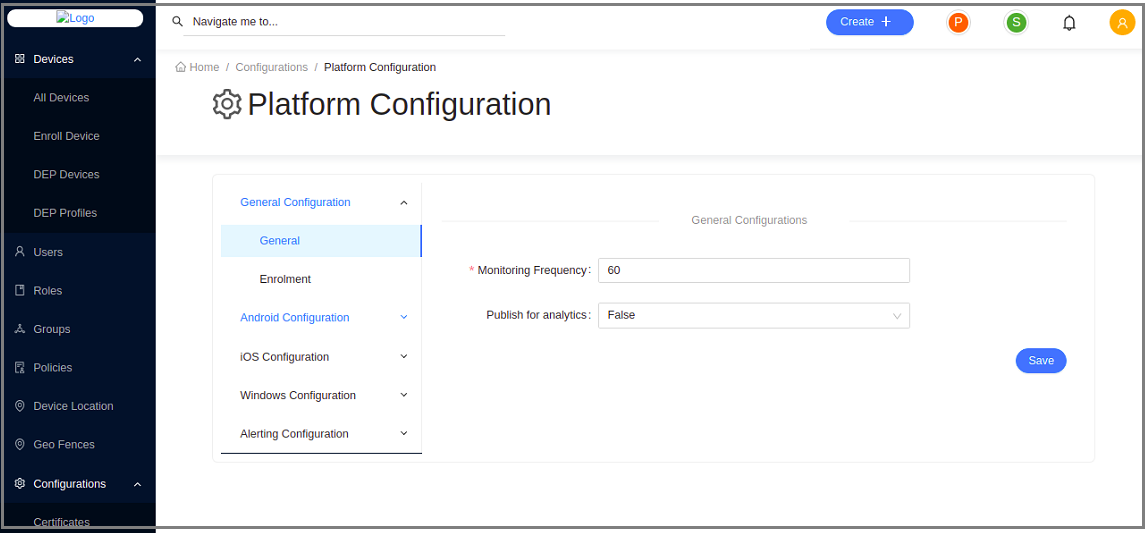
The general platform configurations for Entgra IoT Server involves setting up configurations for monitoring how often the devices are enrolled with the server and for enabling the geofencing feature required for Location-Based Services [LBS] in a multi-tenant environment.
Follow the instructions below to configure the general platform settings:
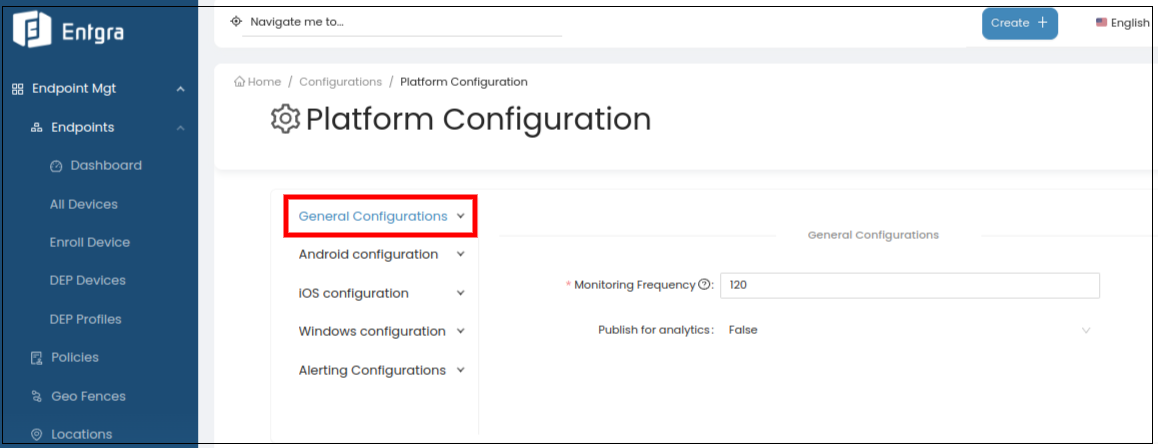
- Sign in to the Entgra IoTS Endpoint Management Console.
- Click Platform Configurations under Configurations.
- Define the Monitoring Frequency in seconds, to monitor the enforced policies on the devices, and click SAVE.
Theme
The theme configuration allows customization of the visual appearance of the platform, providing a consistent and personalized user experience. Tenant admins can customize the platform's theme to align with the organization's branding guidelines.
Follow the instructions below to modify theme configurations:
-
Log in to the Endpoint Management Portal.
-
Go to General Configurations under the Platform Configurations.
-
Select Theme.
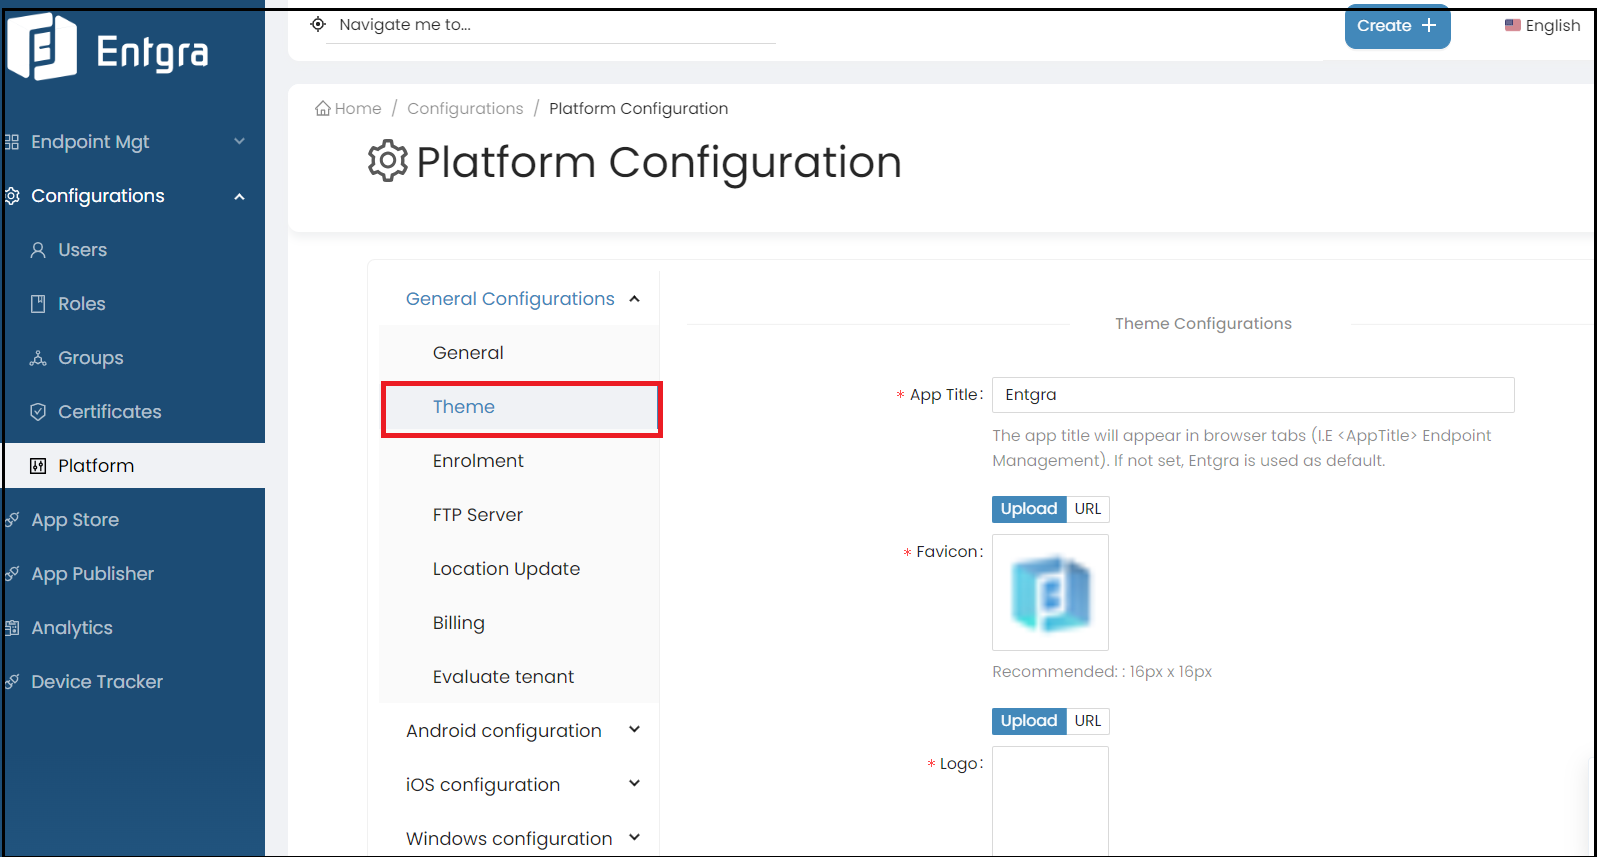
Field Description App Title The app title that appears in browser tabs. (I.E Endpoint Management). If not set, Entgra is used as default. Favicon The favicon will appear in browser tabs. Recommended: 16px x 16px Logo The logo uploaded will be shown on the sidebar. Recommended: min: 320px max: 1920px. Logo Icon The logo icon uploaded will be shown when the sidebar is collapsed. If not set, the default Entgra icon is used. Recommended: min: 320px max: 700px Footer Text The footer text uploaded will be shown in the footer of the console. Recommended: max. 100 char -
Click Save.
Enrollment
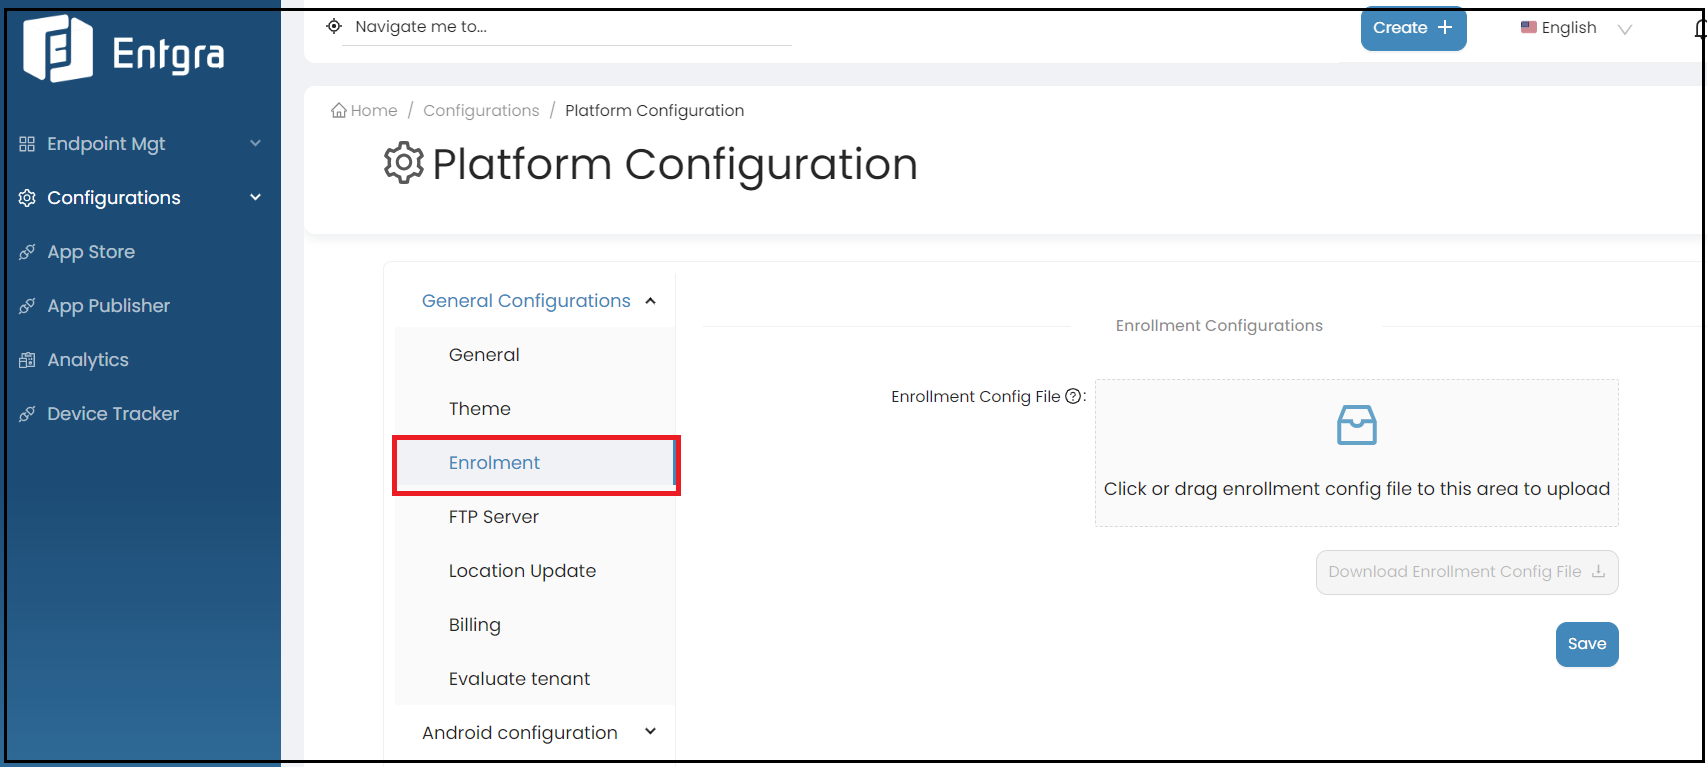
This functionality is used for uploading a set of serial numbers of devices and the user/group that they should be assigned to.
If you upload a JSON file with the device serial and its group prior to enrolling the devices, when enrolling, the server checks the incoming device's serial and looks up the matching group in the JSON, and assigns the device to the correct group.
Follow the steps given below to upload an enrollment config file:
-
Log in to the Endpoint Management Portal.
-
Go to General Configurations under the Platform Configurations.
-
Select Enrollment.
Billing
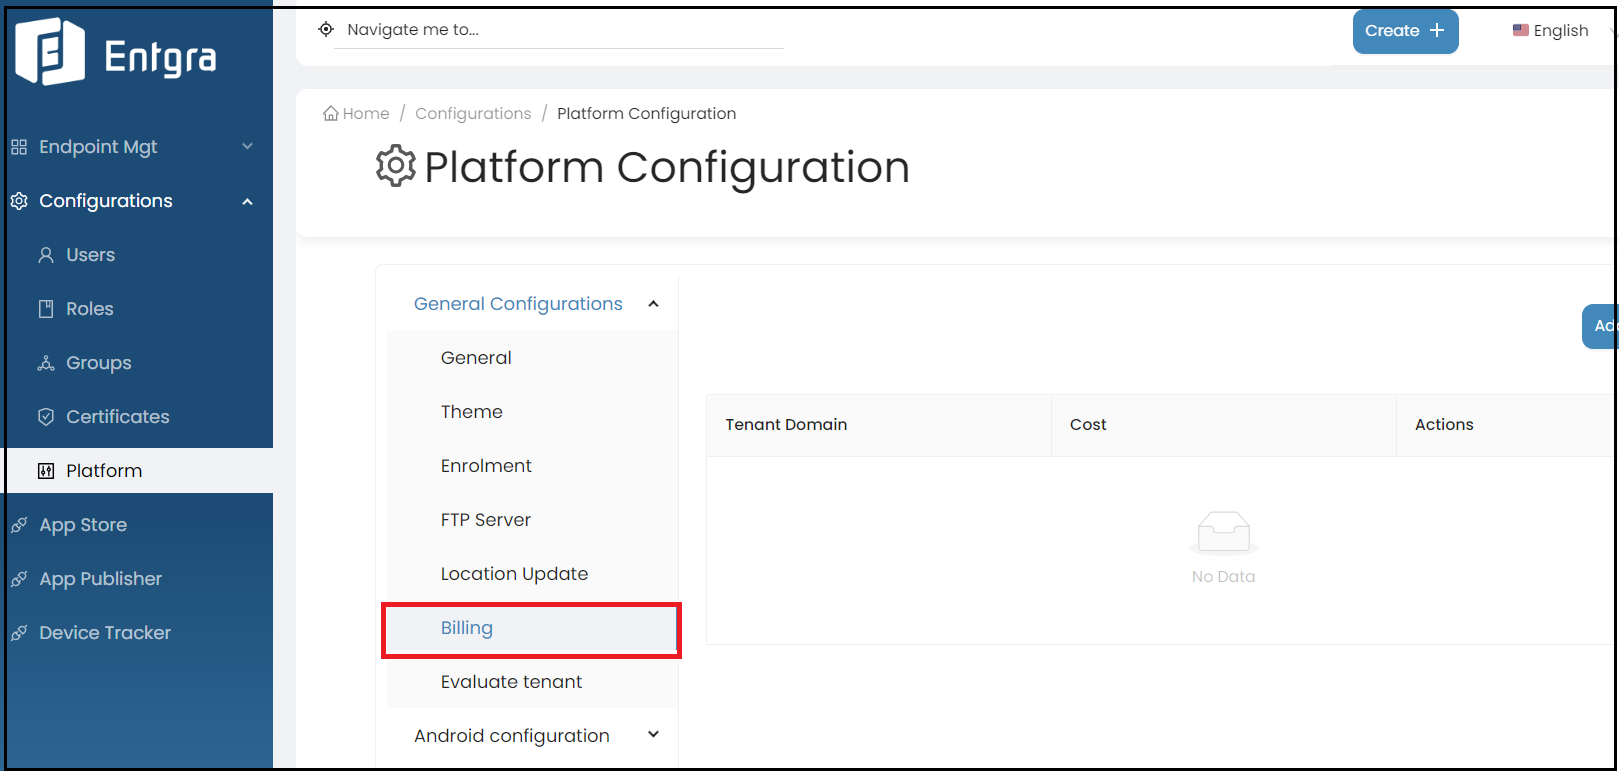
The billing feature is used to generate the usages of the devices enrolled by each tenant.
Follow the instructions below to access the feature:
-
Log in to the Endpoint Management Portal.
-
Go to General Configurations under the Platform Configurations.
-
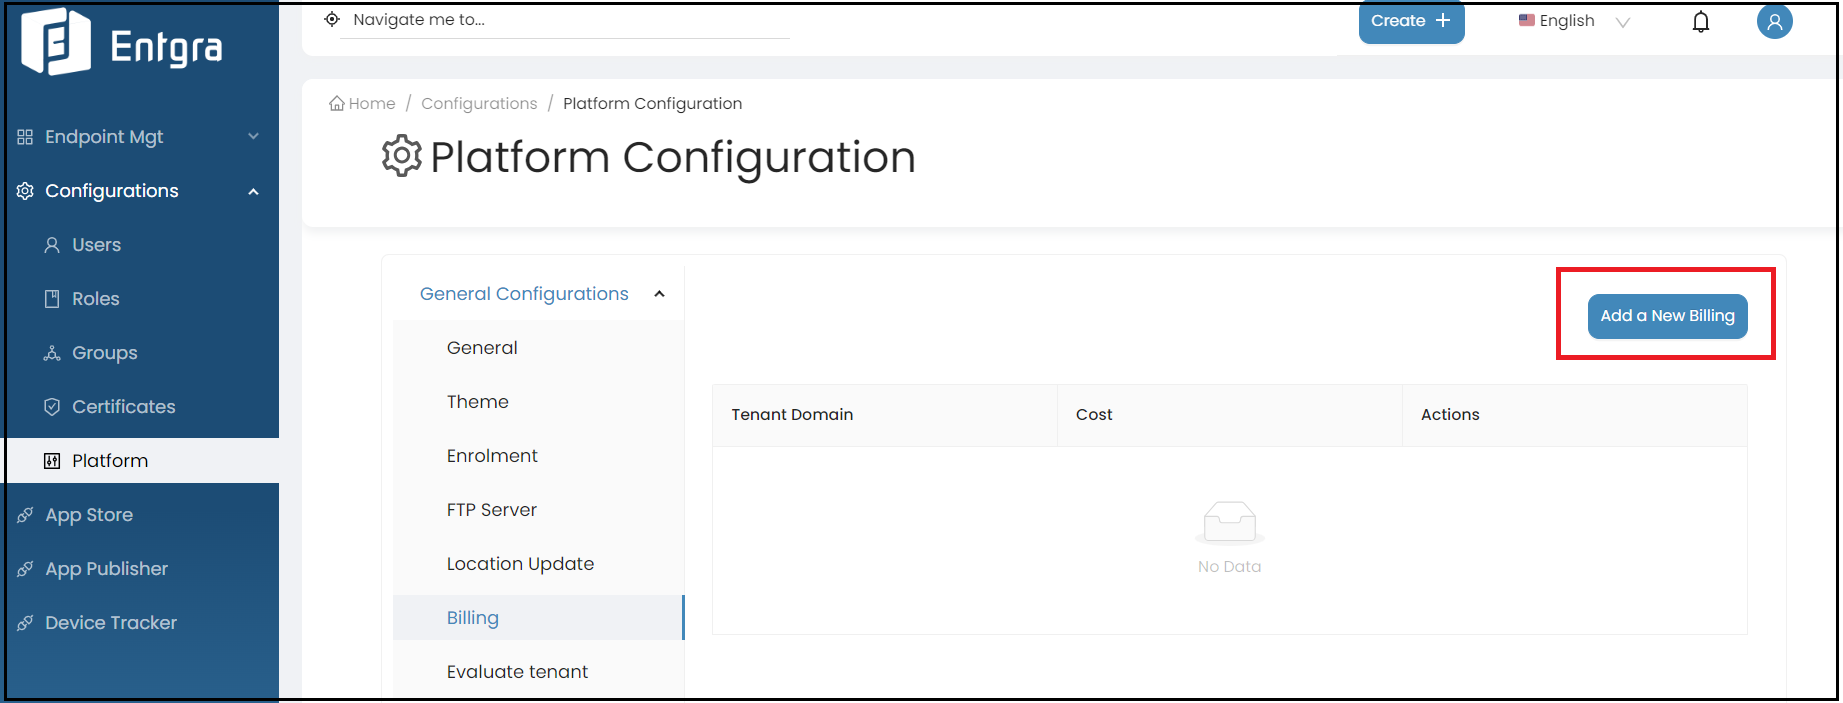
Select Billing.
-
The super admin user has access to add the annual cost for a device for each tenant. Click Add a New Billing.
-
Select the tenant domain from the dropdown list.
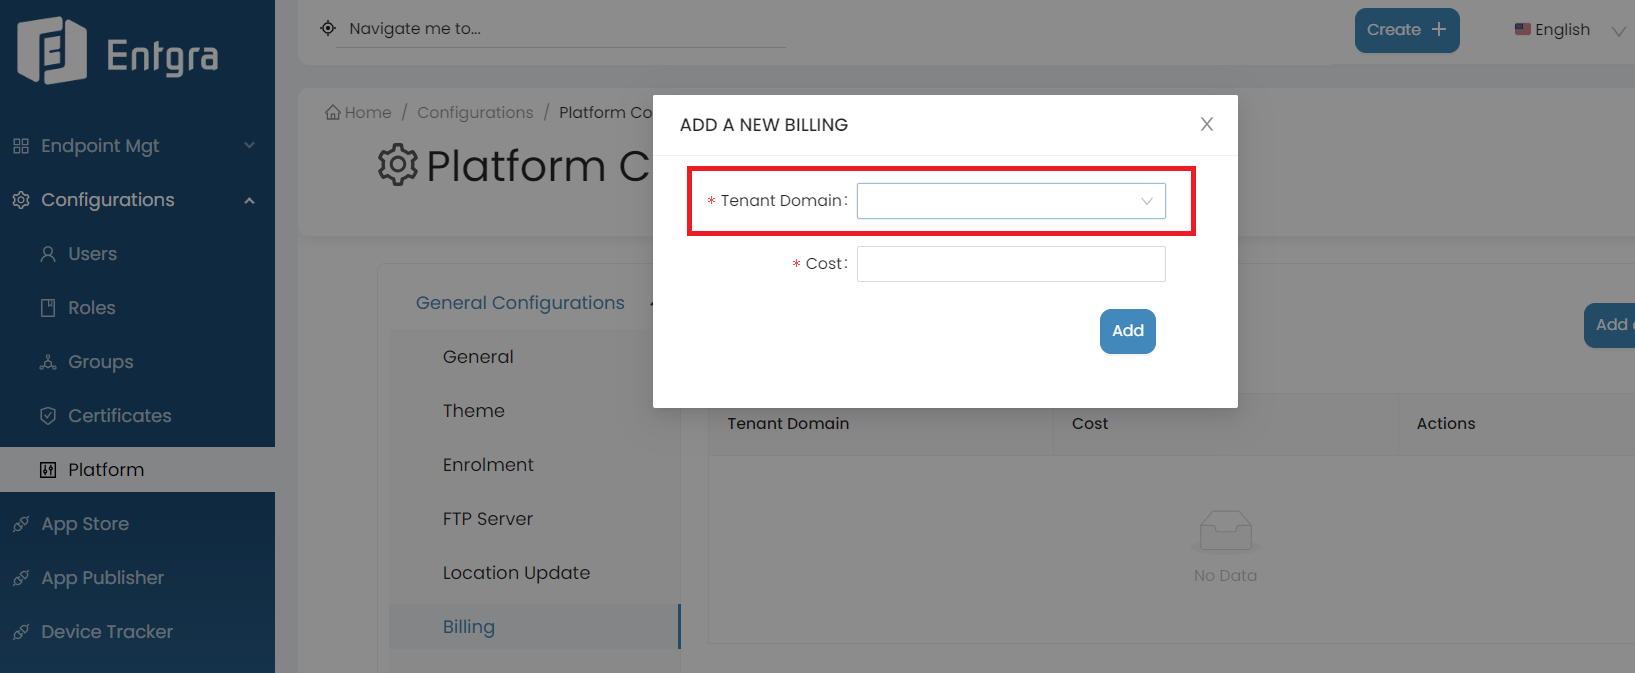
-
Add the annual cost for a device belonging to the tenant.
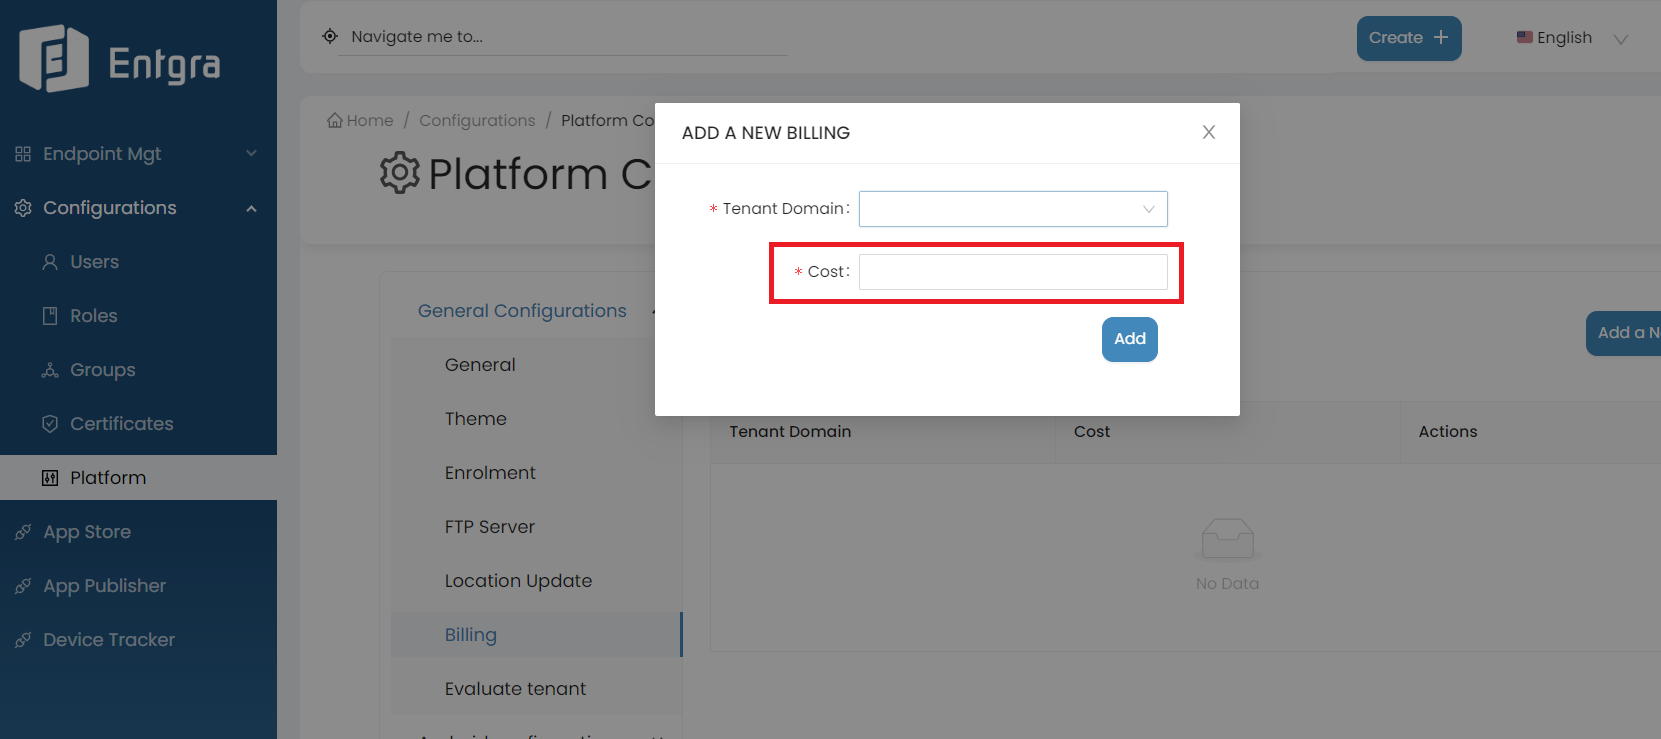
-
Click Add.
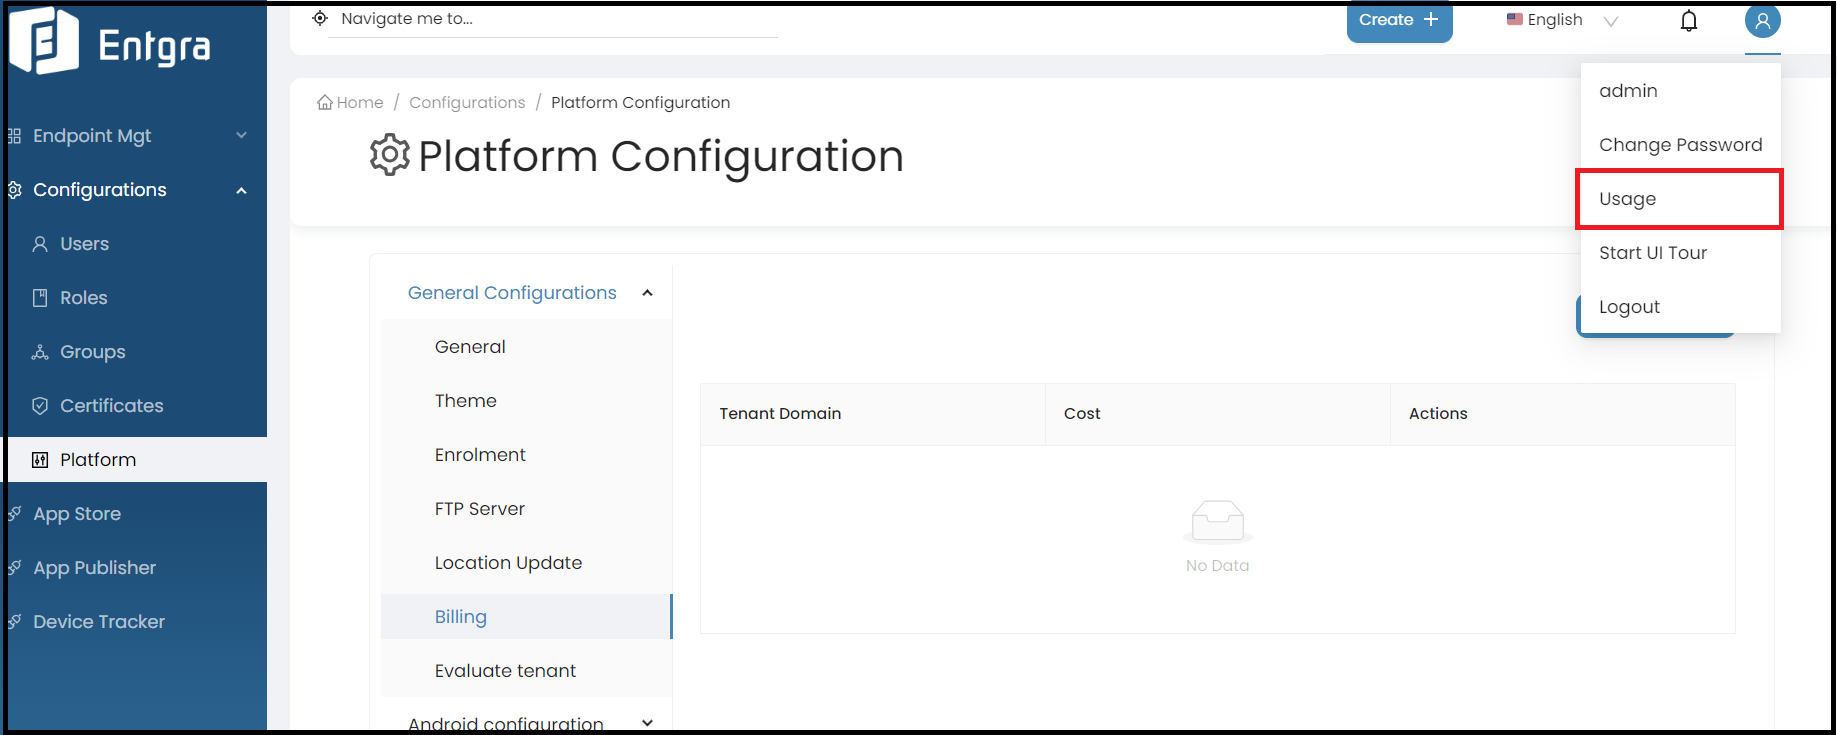
-
Super admin and other admins of the tenant will have the ability to generate usage reports for the devices they have utilized. Go to the Usage section in the main profile dropdown menu.
-
Enter start date and end date.
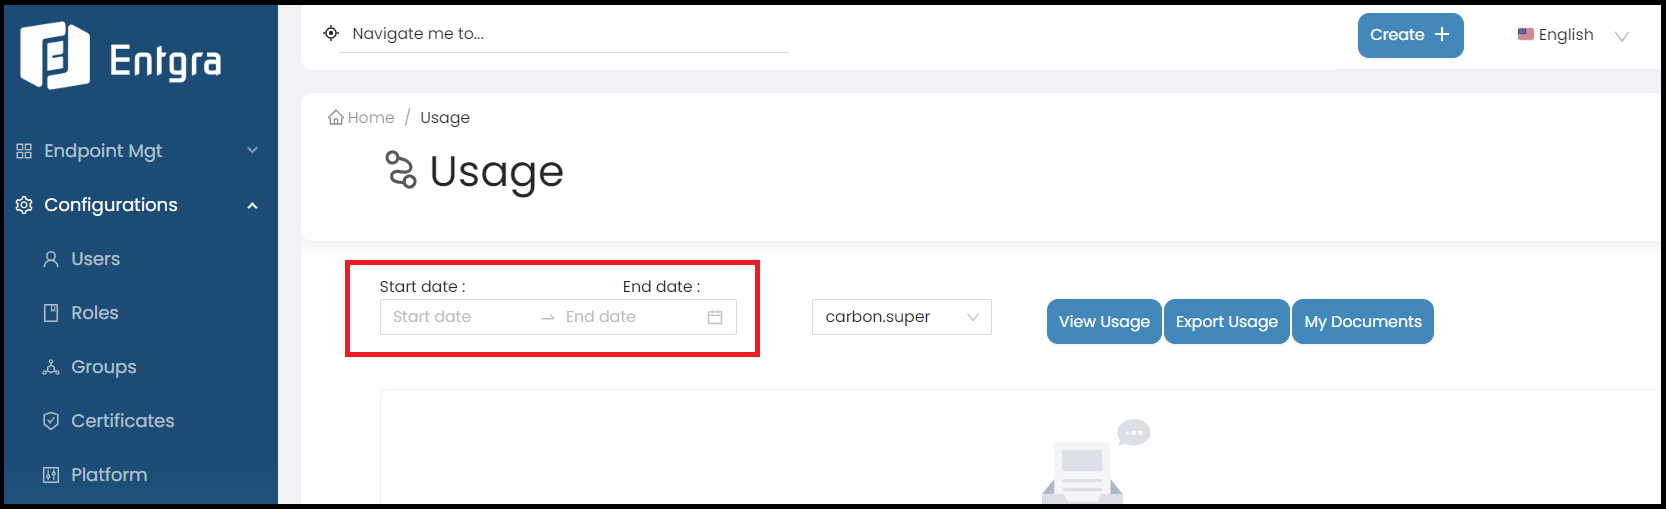
Field Description Start date The start of the usage period. End date The end of the usage period. -
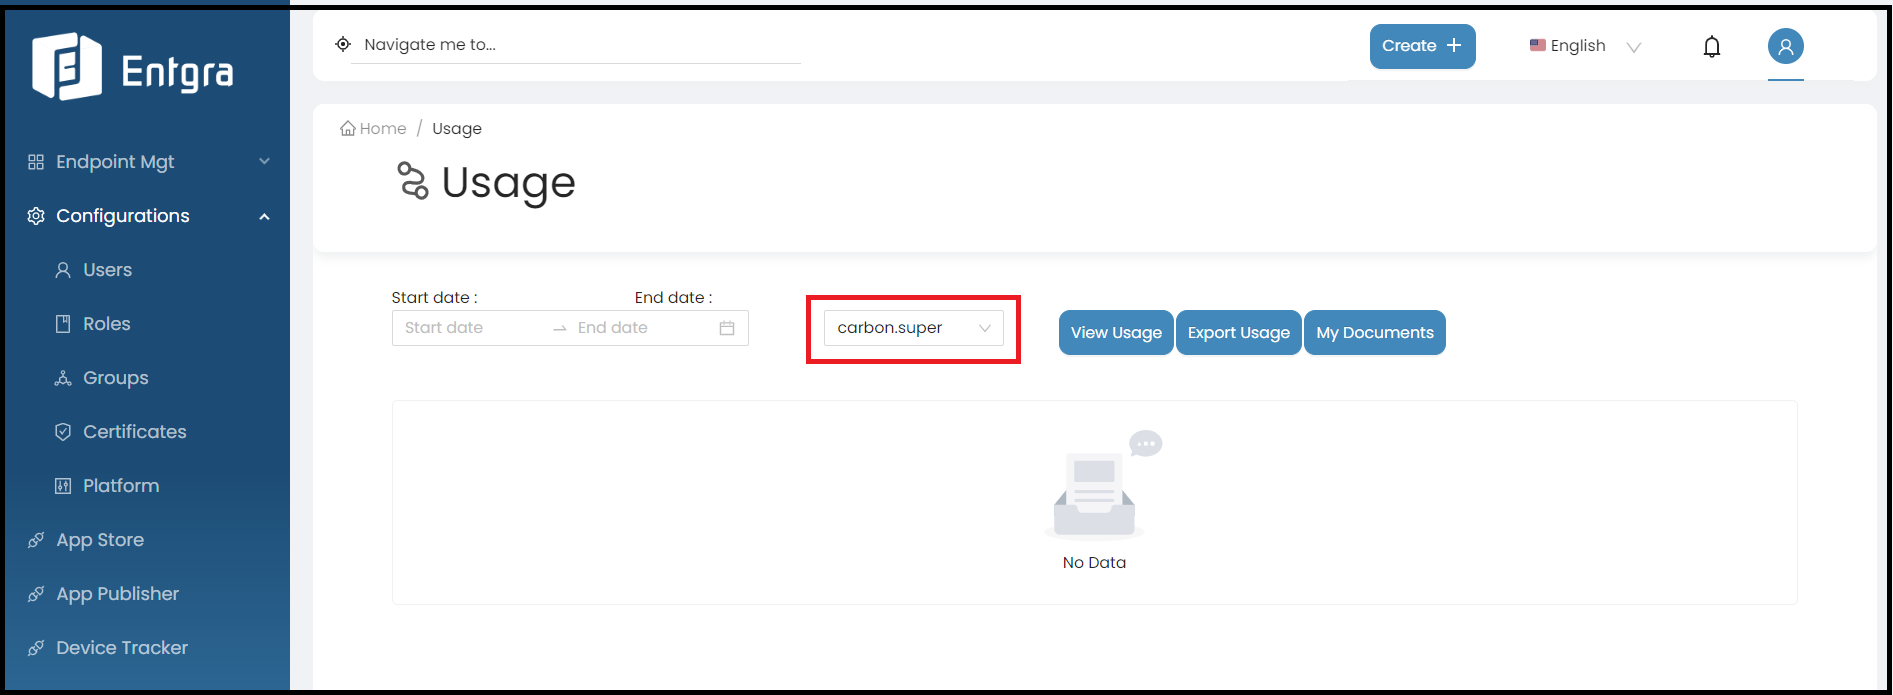
Select the tenant domain from the dropdown list.
Note: This option is only visible for super tenant admin users and is used to check the usage of other tenants.
-
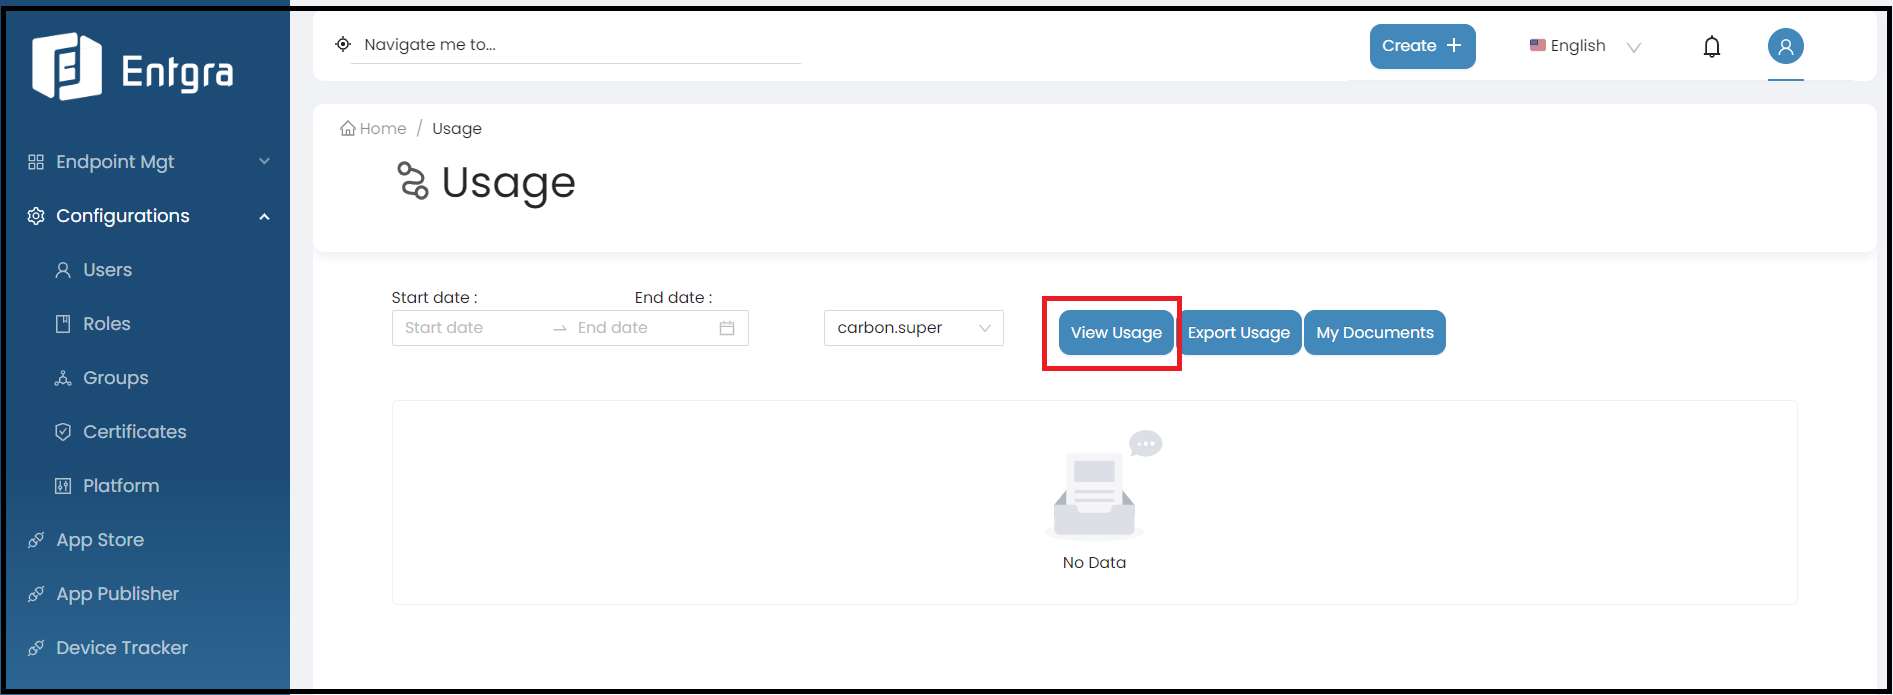
Click View Usage and usages of the tenant devices will be generated for the entered period.
-
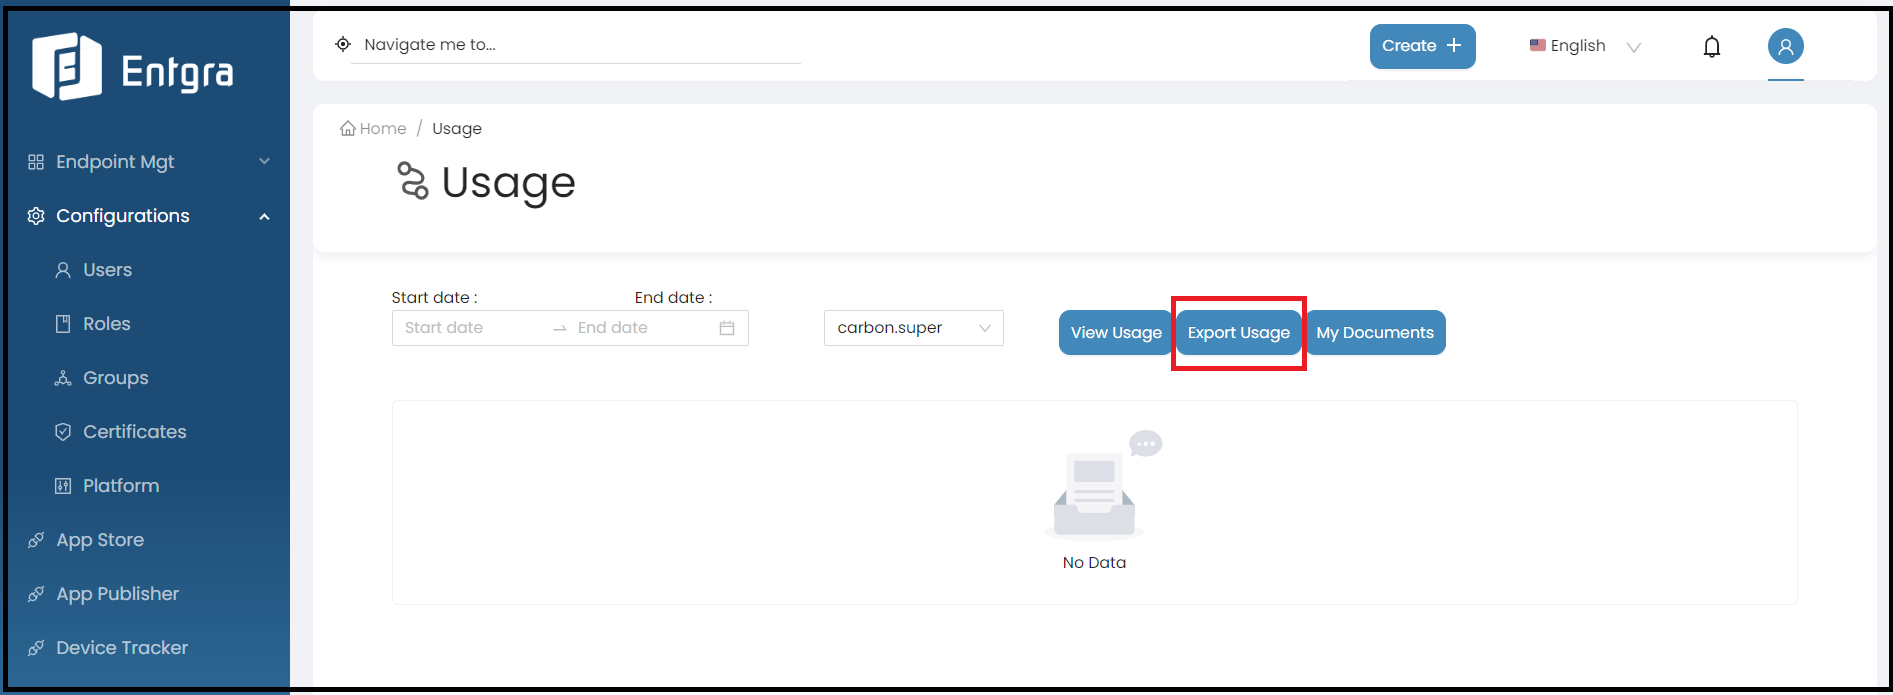
Click Export Usage to generate the CSV file containing the usage data.
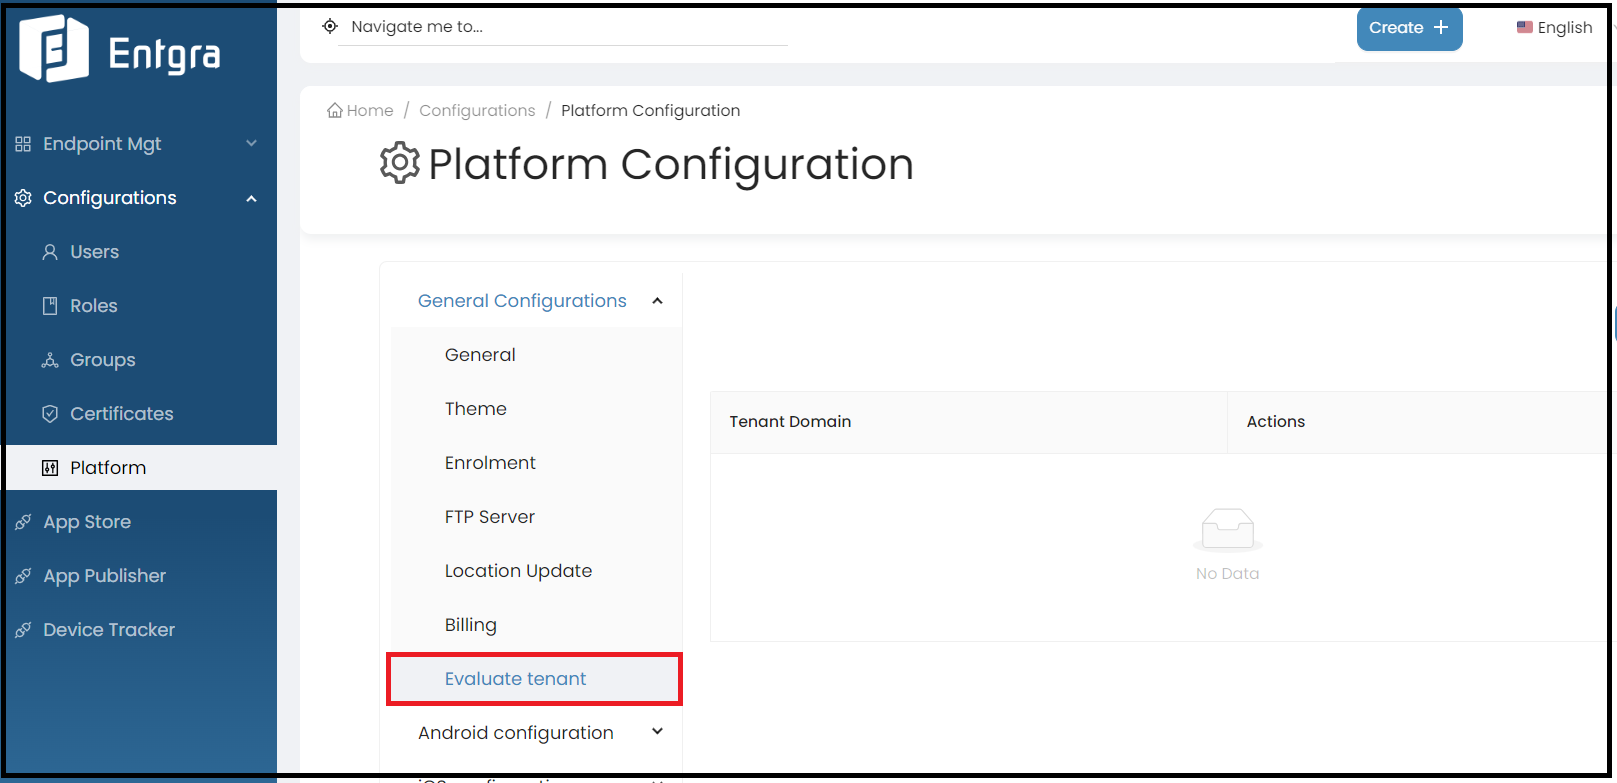
Evaluate Tenant
In order to enable the Entgra UEM live chat feature for customers, a super admin must evaluate and approve their access.
Follow the instructions below to evaluate tenants for live chat feature:
-
Log in to the Endpoint Management Portal.
-
Go to General Configurations under the Platform Configurations.
-
Select Evaluate Tenant.
-
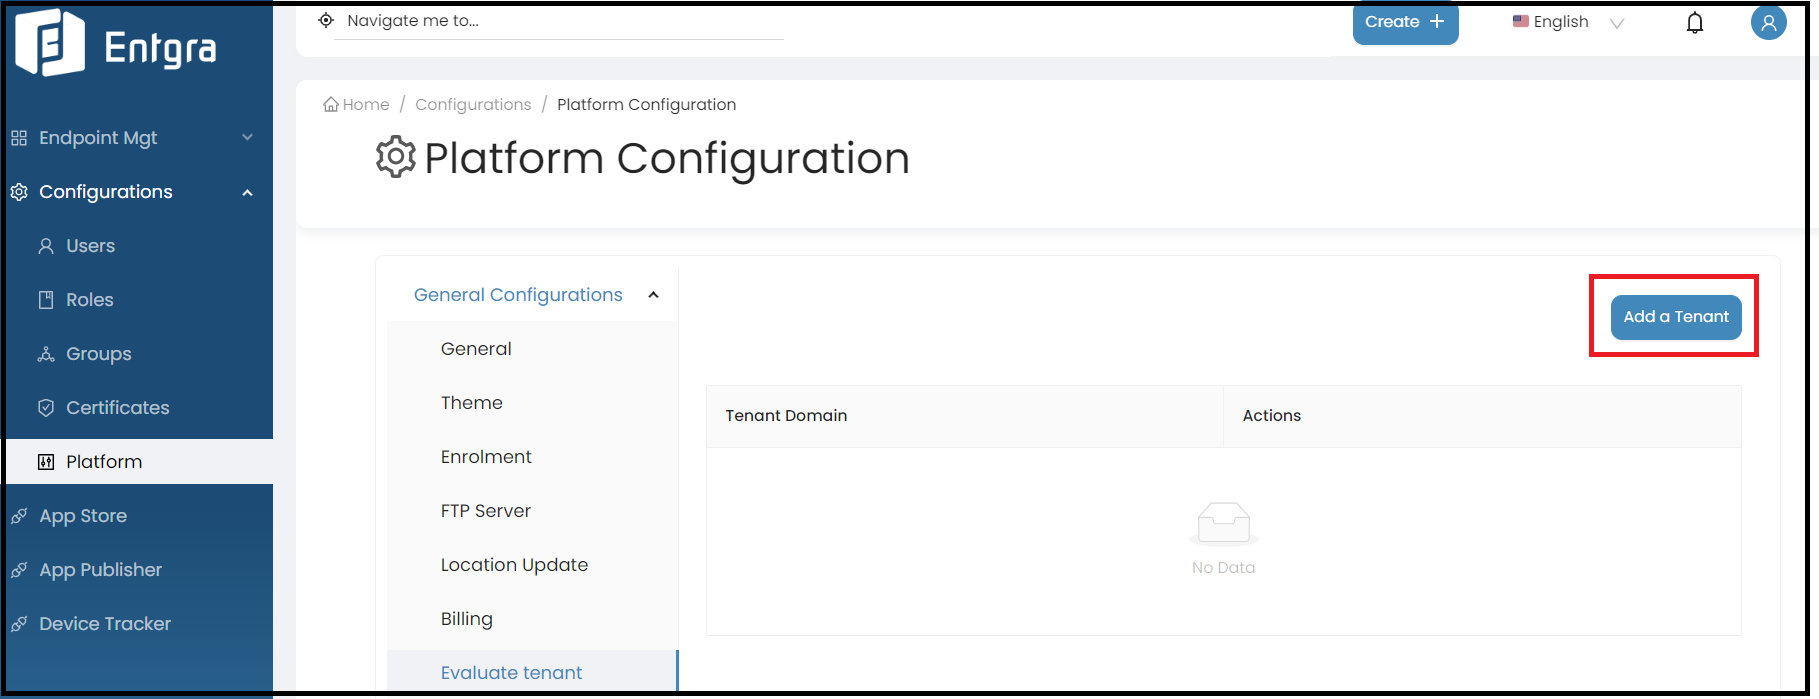
Click Add a Tenant.
-
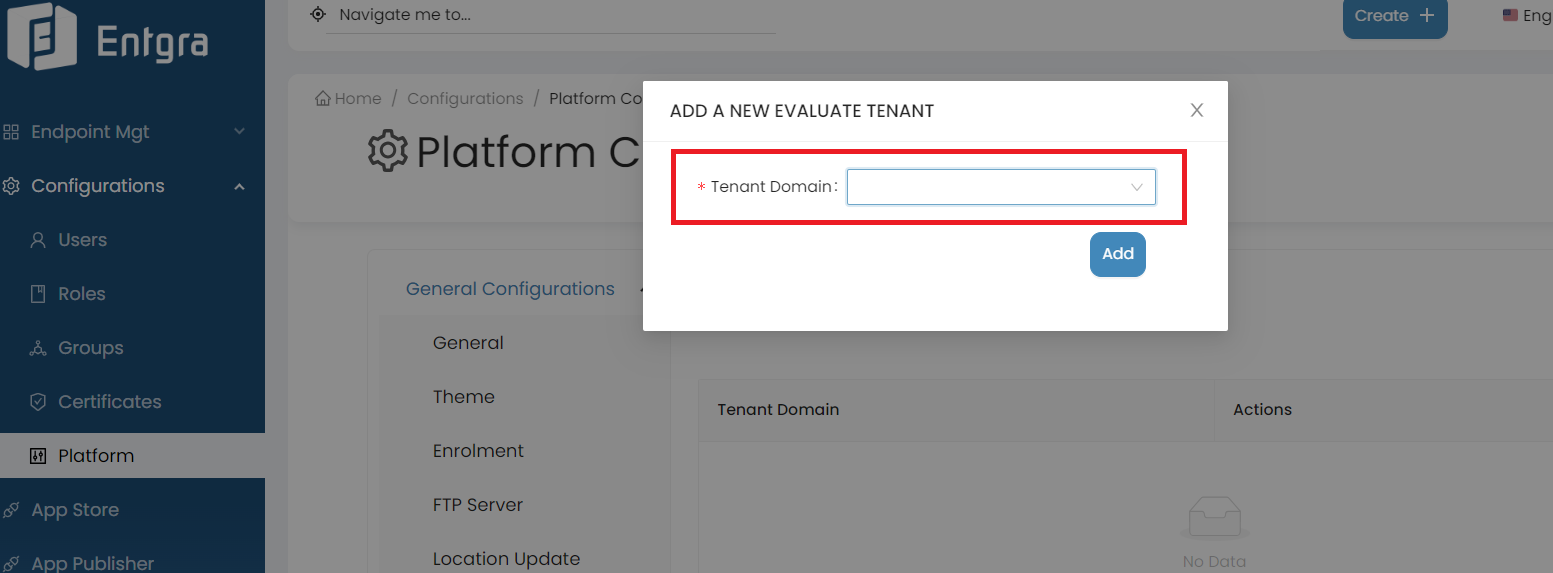
Select a new tenant to be evaluated from the dropdown list.
-
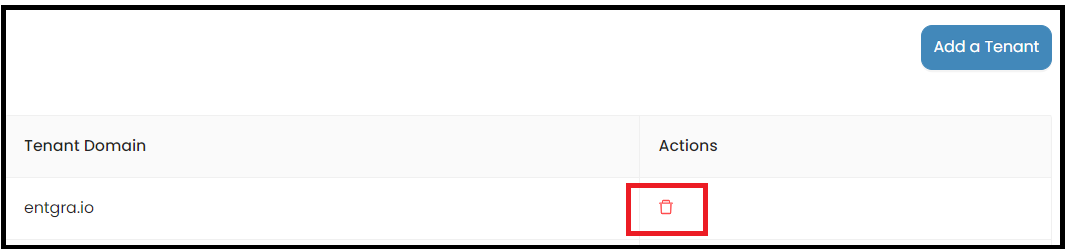
Click on the remove icon if you want to delete an existing evaluate tenant.
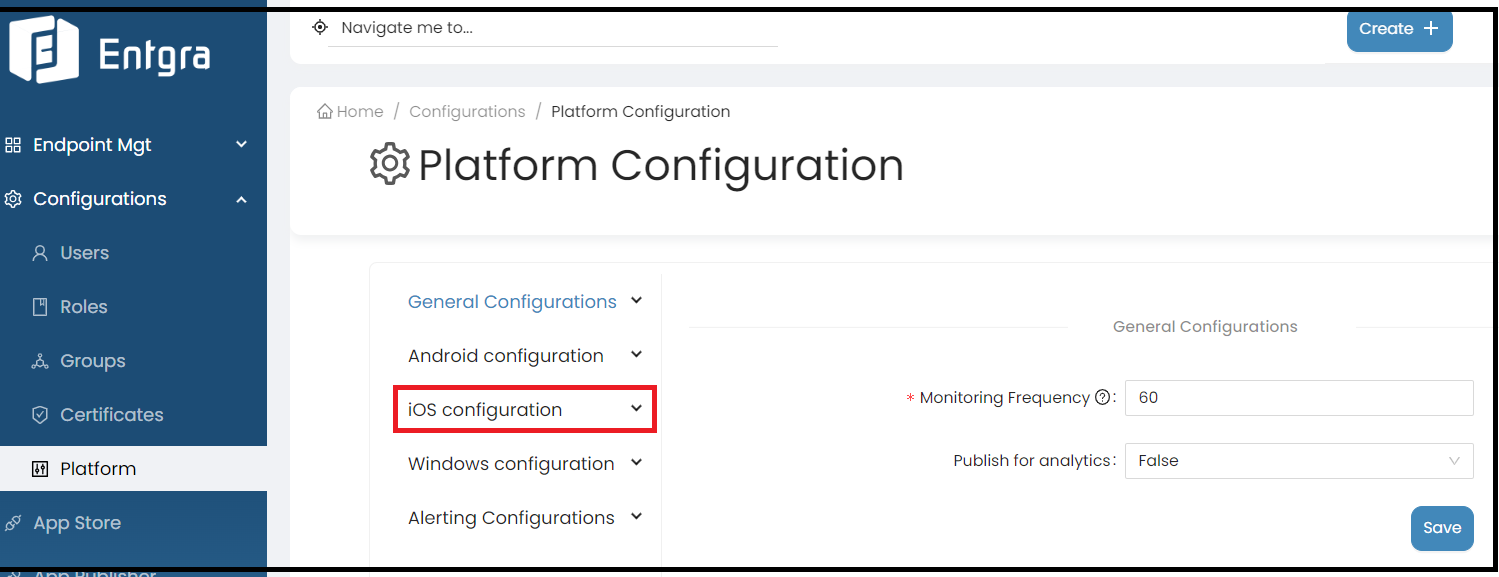
iOS Configurations
Multiple tenants can use Entgra UEM while maintaining tenant-based isolation. The iOS configurations enable the tenants to customize the iOS settings based on their own requirements.
Follow the steps given below to configure the iOS platform:
-
Log in to the Endpoint Management Portal.
-
Click Platform Configurations under Configurations.
-
Click iOS Configurations under Platform Configurations.
MDM Profile
By following the steps below, you can modify SCEP Certificate, Profile and MDM Configurations;
-
Log in to the Endpoint Management Portal.
-
Go to iOS Configurations under the Platform Configurations.
-
Select MDM Profile.
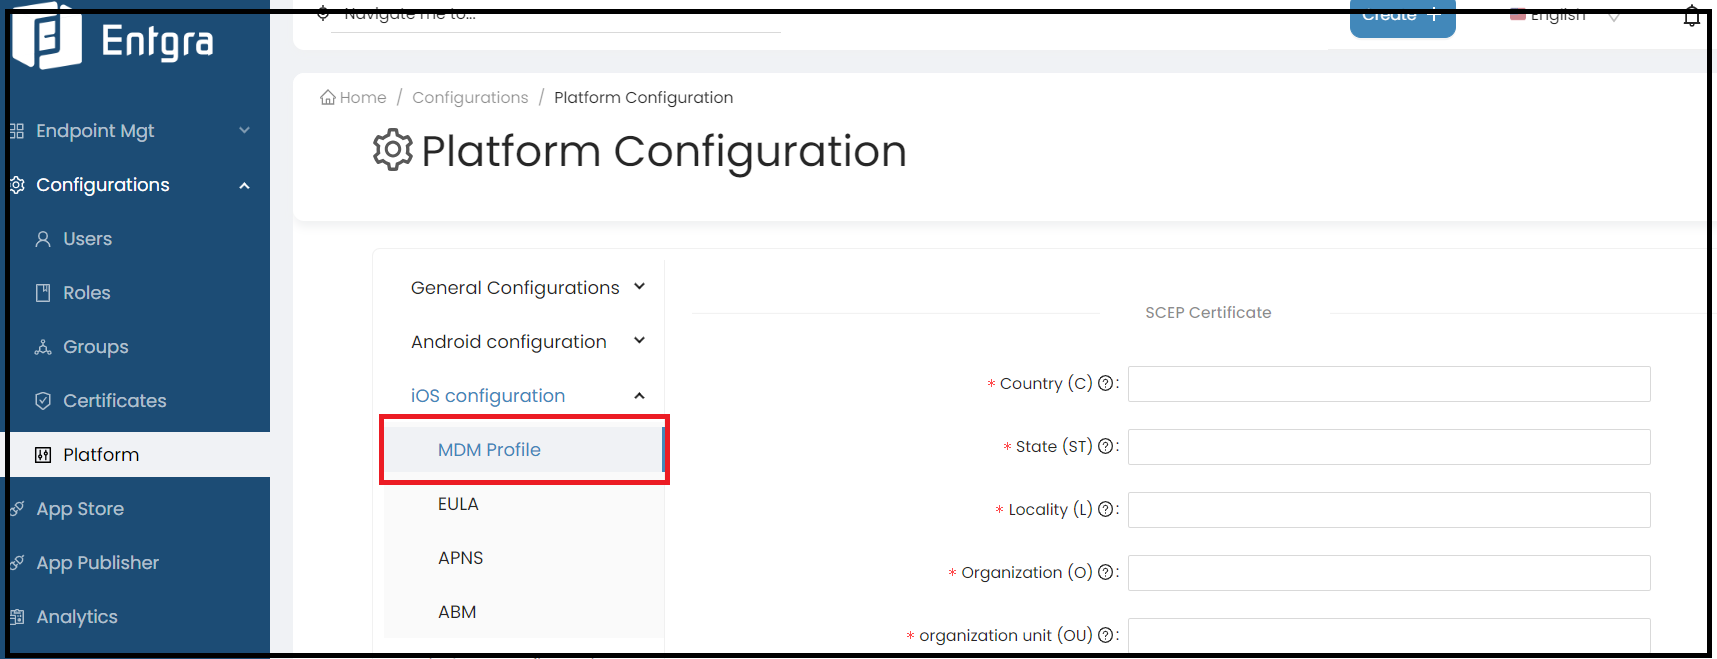
iOS SCEP Certificate Configurations
When an iOS device enrolls with Entgra UEM two iOS Simple Certificate Enrollment Protocol (SCEP) certificates will be created on the fly based on the given SCEP configurations.
| Field | Description |
|---|---|
| Country (C) | The country where the tenant is based. |
| State (ST) | The state where the tenant is based. |
| Locality (L) | The locality where the tenant is based. |
| Organization (O) | The name of the organization where the tenant is based. |
| Organization unit (OU) | The name of the organization unit where the tenant is based. |
iOS Profile Configurations
The details of the organization need to be added.
| Field | Description |
|---|---|
| Organization Display Name | The name of the organization. |
iOS MDM Configurations
The details with respect to the iOS IoTS APNS certificate need to be added.
| Field | Description |
|---|---|
| MDM Certificate | Select the iOS IoTS APNS certificate that was previously created. |
| MDM Certificate Password | The password that was used when converting the IoTS certificate from a .pem file to the .pfx file. |
| MDM certificate topic ID | The USER ID mentioned in the IoTS signing certificate. |
| Mode | Production - Use this option if you are configuring IoTS for a production environment. |
| Mode | Developer - Use this option if you are configuring IoTS for a testing environment. |
EULA
Provide the End User License Agreement that a user must adhere to when enrolling an iOS device with IoTS. By following the steps below, you can modify the license agreement for end users;
-
Log in to the Endpoint Management Portal.
-
Go to iOS Configurations under the Platform Configurations.
-
Select EULA.

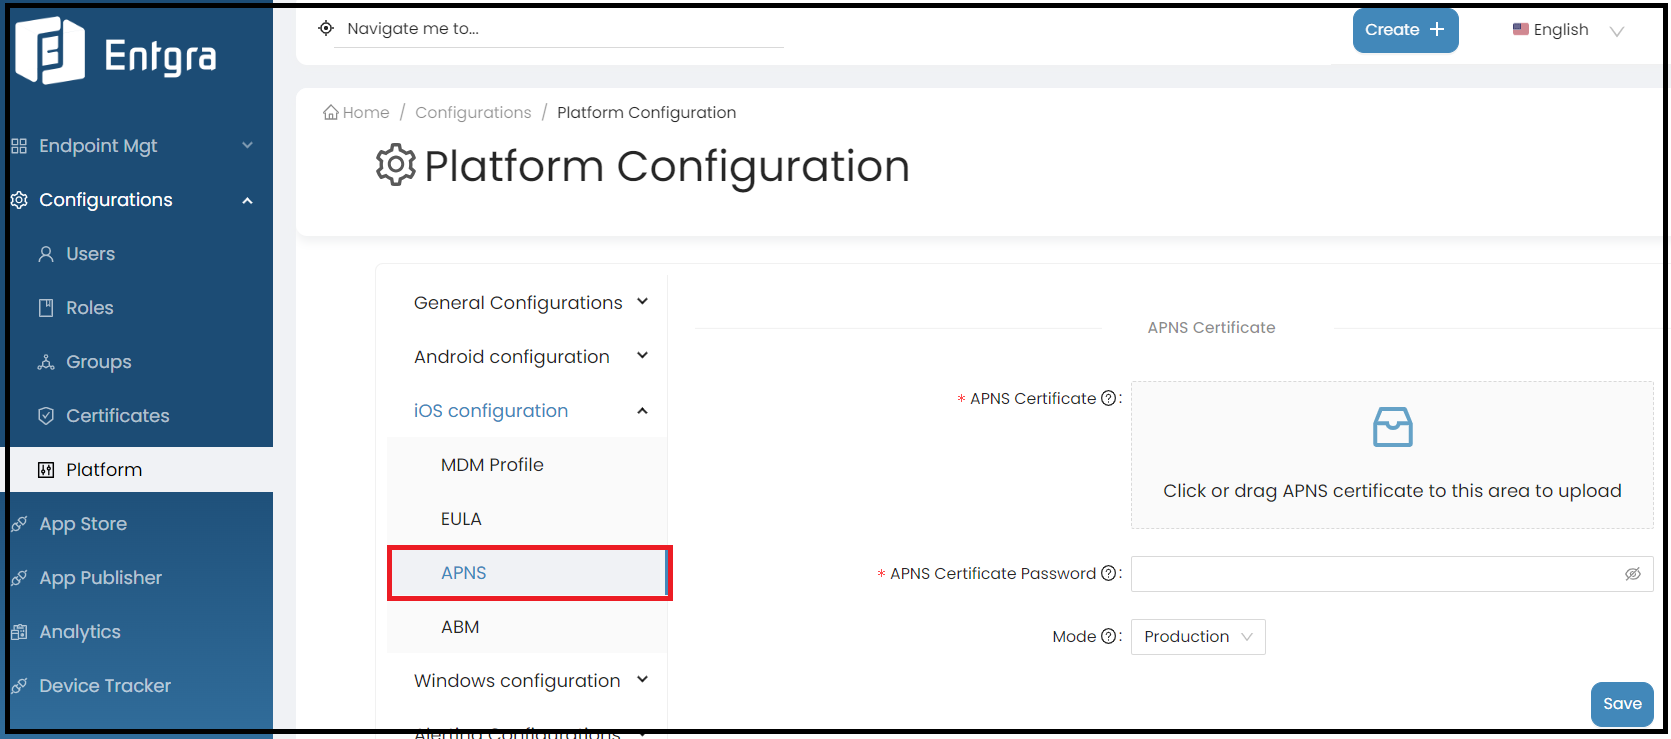
APNS
The details with respect to the Apple Push Notification Service need to be added here. By following the steps below, you can configure APNS;
-
Log in to the Endpoint Management Portal.
-
Go to iOS Configurations under the Platform Configurations.
-
Select APNS.
| Field | Description |
|---|---|
| APNS Certificate | Select the APNS certificate that was previously created. |
| APNS Certificate Password | Enter the password provided when exporting the iOS APNS certificate. |
| Mode | The available modes have been explained as follows: Production - Use this option if you have configured a production APNS certificate. Developer - Use this option if you have configured a development APNS certificate. |
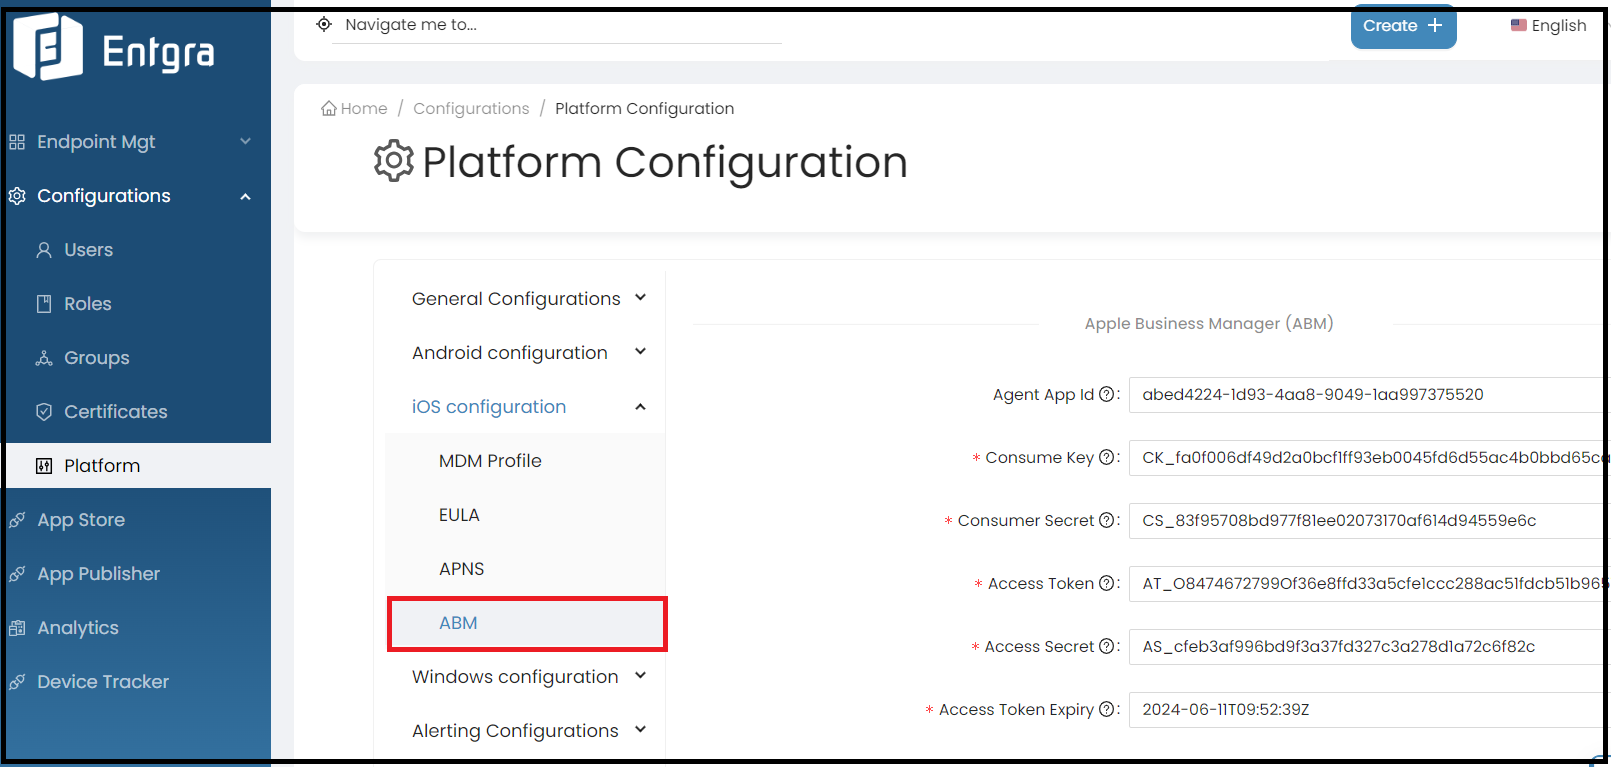
ABM
To effectively manage your DEP-enrolled devices within the Entgra UEM console, follow these steps to enable and configure the Apple Business Manager(ABM).
By following the steps below, you can configure ABM;
-
Log in to the Endpoint Management Portal.
-
Go to iOS Configurations under the Platform Configurations.
-
Select ABM.
| Field | Description |
|---|---|
| Agent App ID | The App ID of the ABM agent stored in the internal app store. |
| Consume Key | Consumer key value of the ABM token. |
| Consumer Secret | Consumer secret value of the ABM token. |
| Access Token | Access token value of the ABM token. |
| Access Secret | Access secret value of the ABM token. |
| Access Token Expiry | Access token expiry value of the ABM token. |
Geofencing
Geofencing enables you to set up virtual perimeters for controlling access over specified boundaries. A very useful feature in governing access for user groups, it can be conveniently set up by drawing boundaries over areas on the map.
Configurations
- Sign in to the Entgra IoTS Endpoint Management Console.
- Click Configurations.
- Go to Platform Configuration.
-
In Alerting Configurations, select the Geo Alerts.
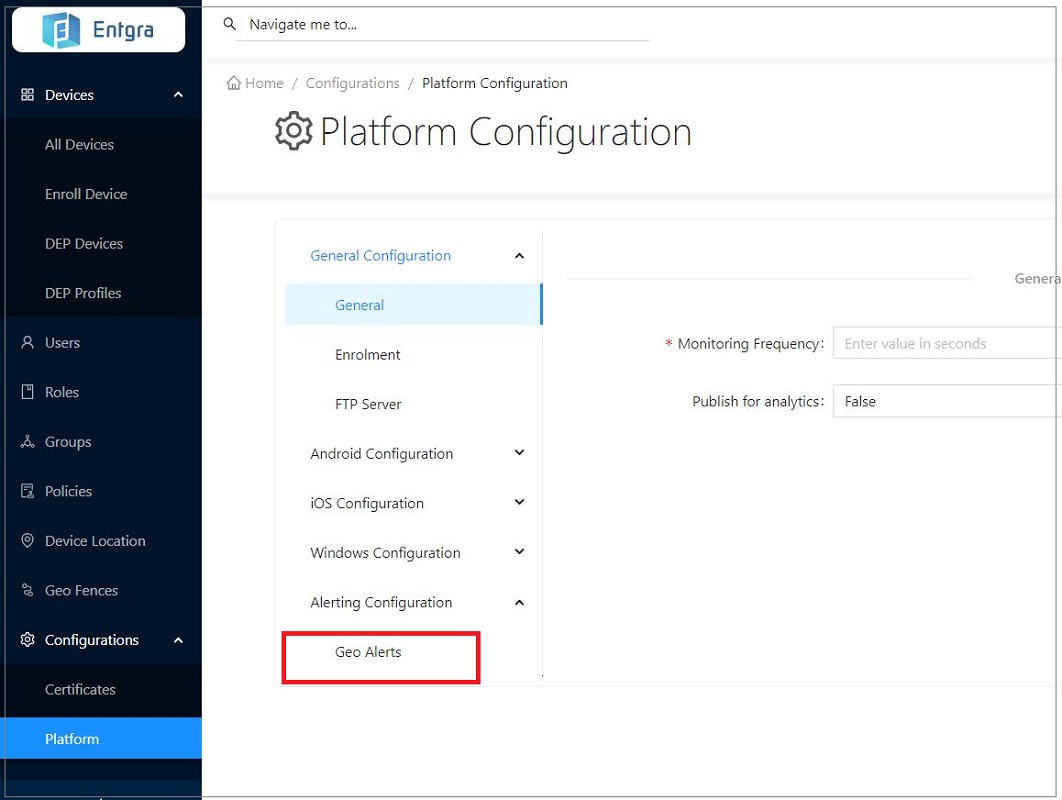
-
Fill in the required fields.
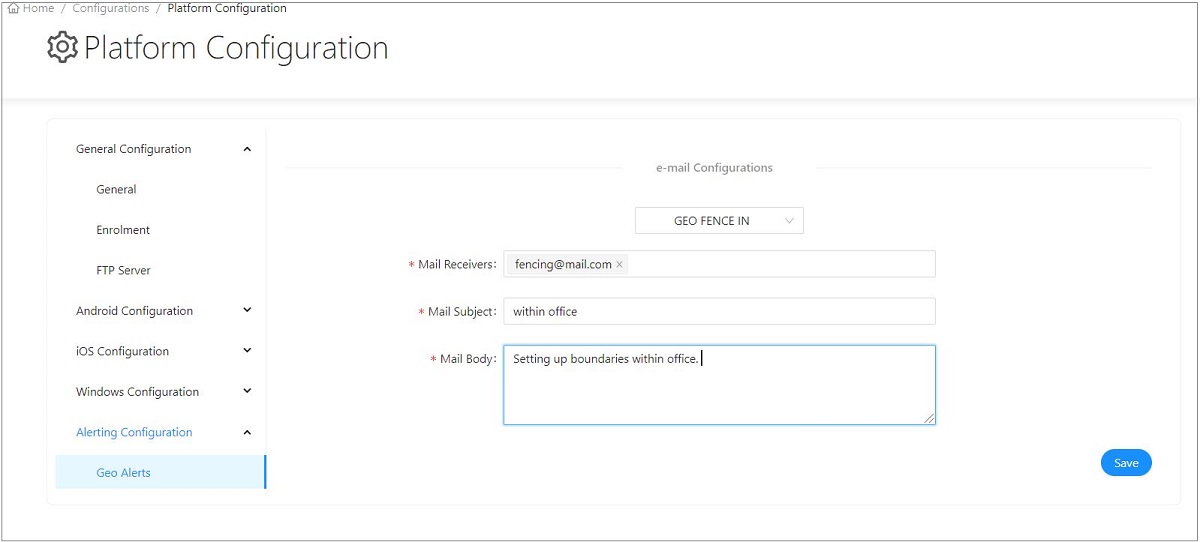
-
Click Save.
Creating Geofences
- Click Create + in the top right corner.
-
Select Geo Fence.
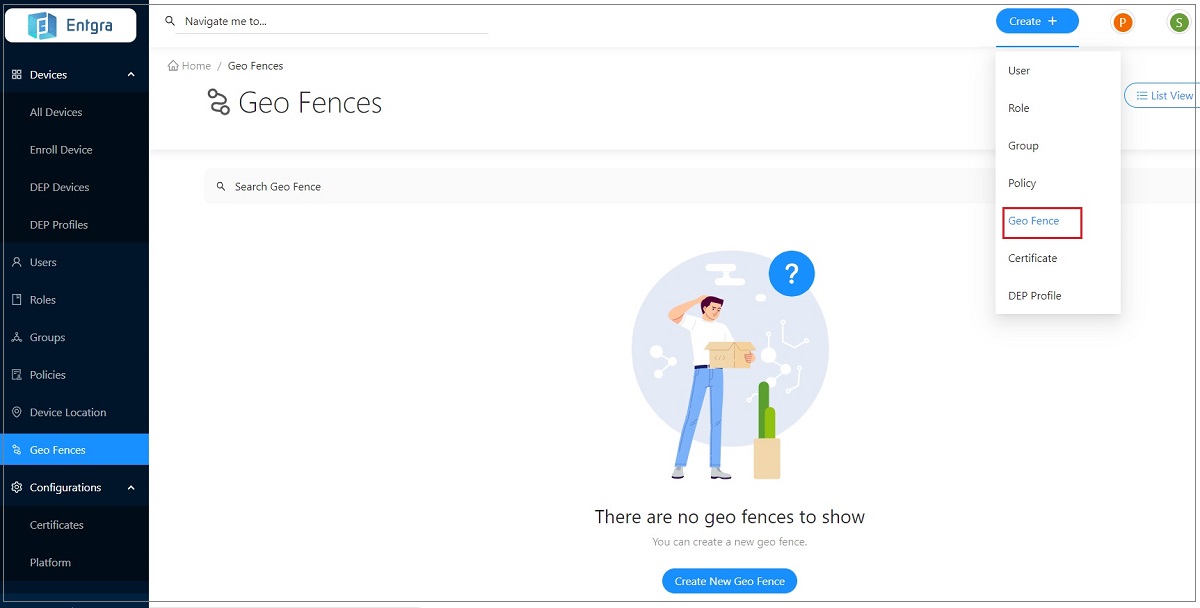
-
Fill in the required information.
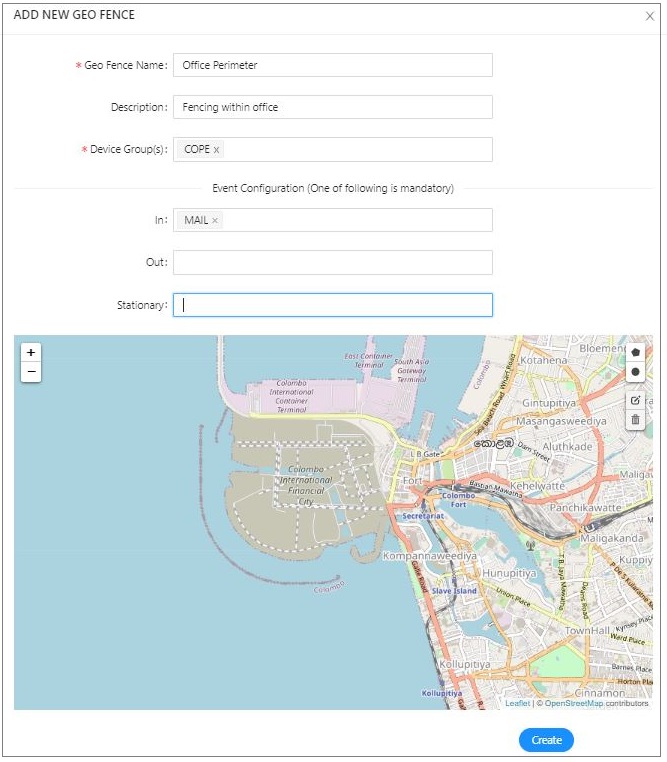
-
Create a geofence to include the desired area. You can create it using a circle or any other poligonal shape.

-
Click Create.
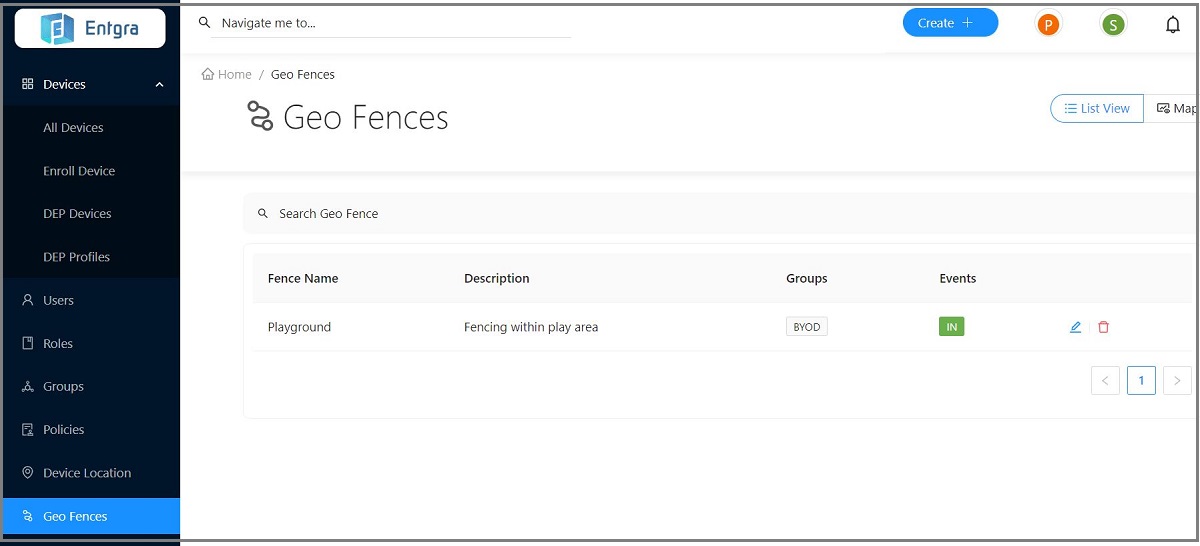
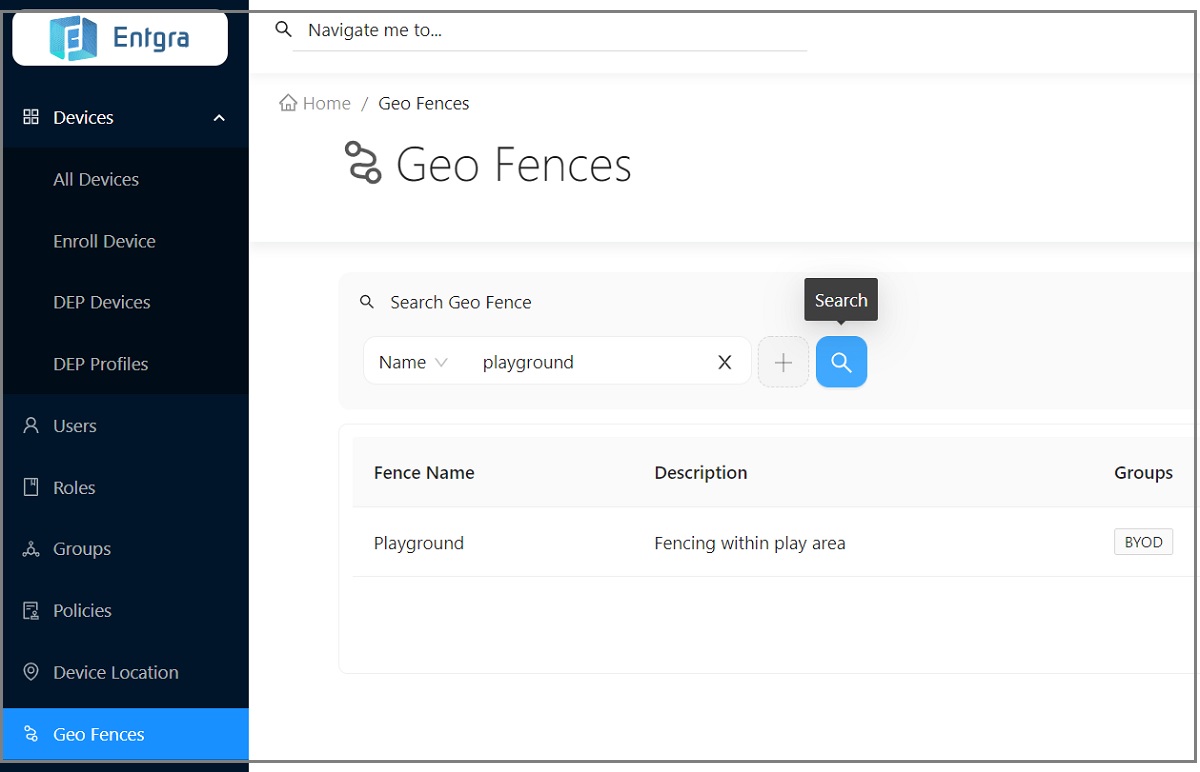
Searching for Geofences
- Click on the Search Geo Fence bar on top of the geofences table.
-
Add relevant tags for searching and then click Search.
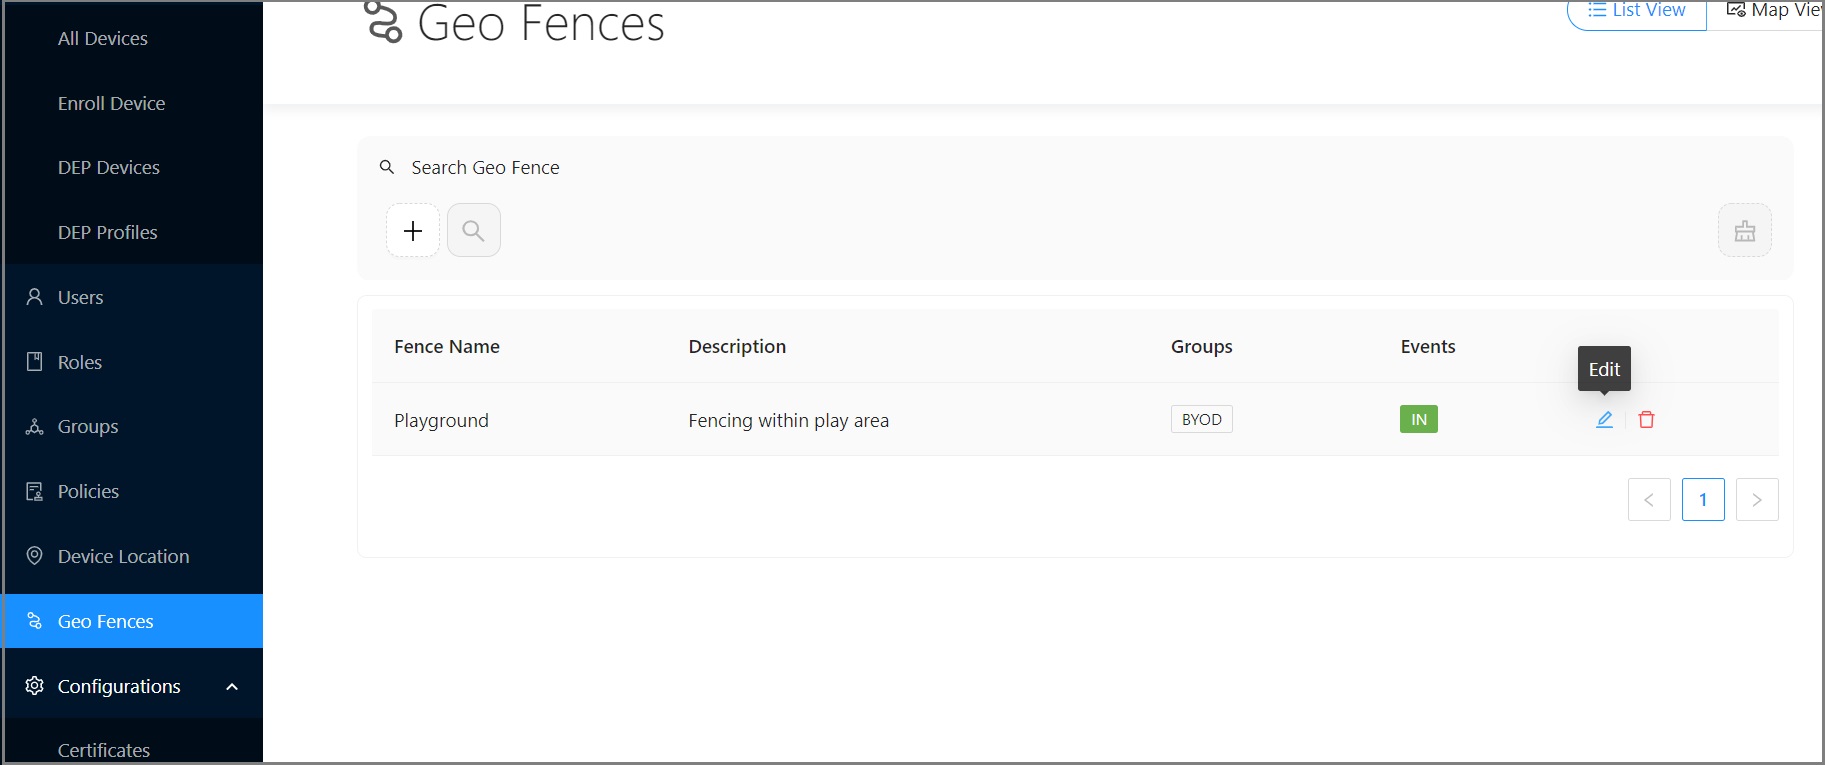
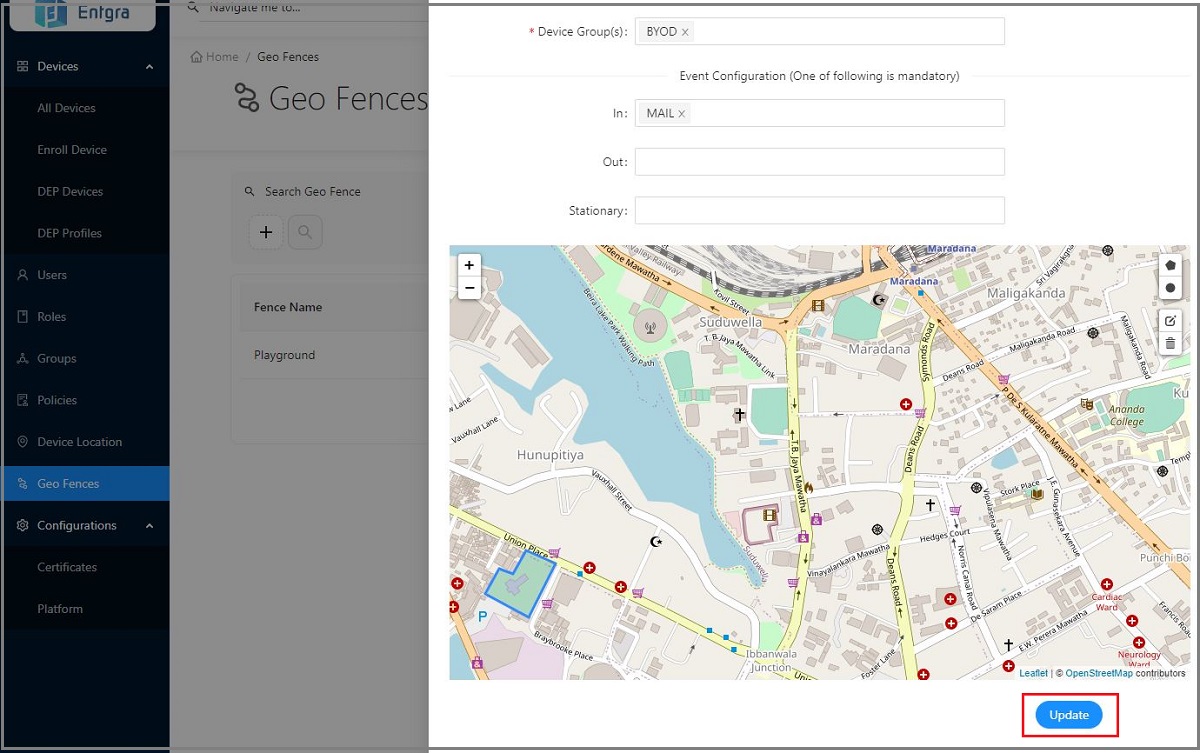
Updating Geofences
- Go to Geo Fences and search for the record that you wish to edit.
-
Click Edit.
-
Update information as required.
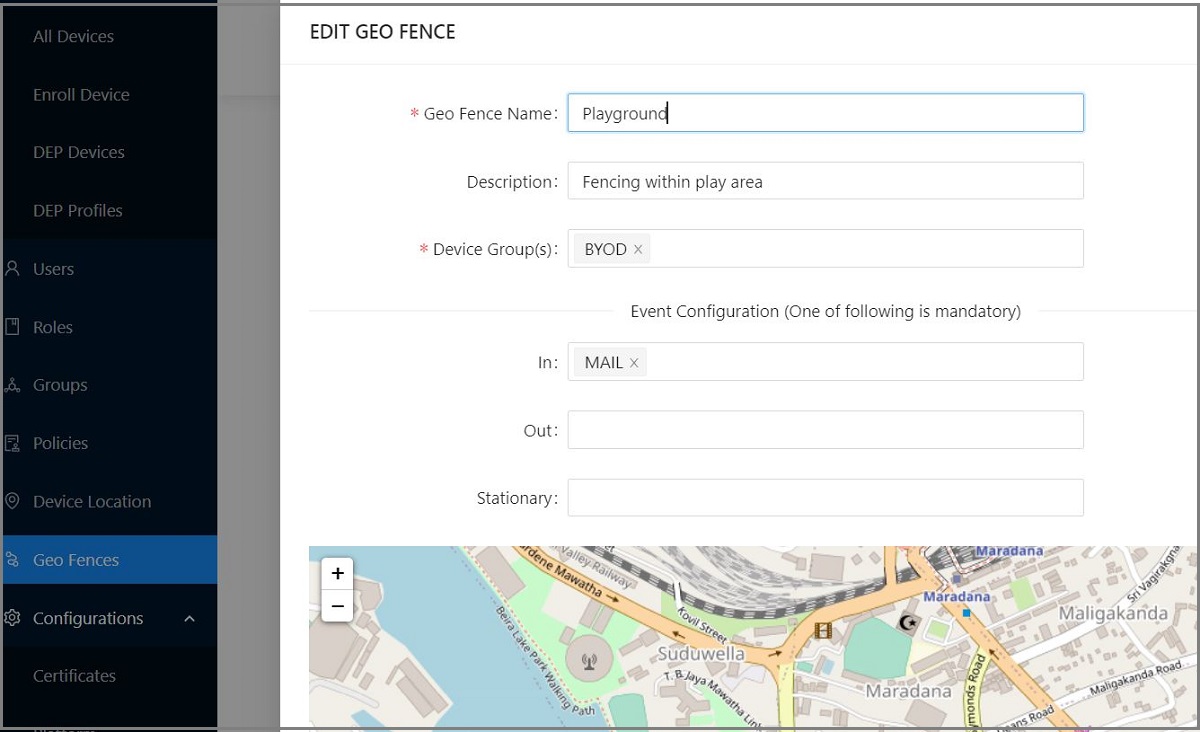
-
Click Update.
Removing Geofences
- Go to Geo Fences and search for the record that you wish to delete.
-
Click Delete.
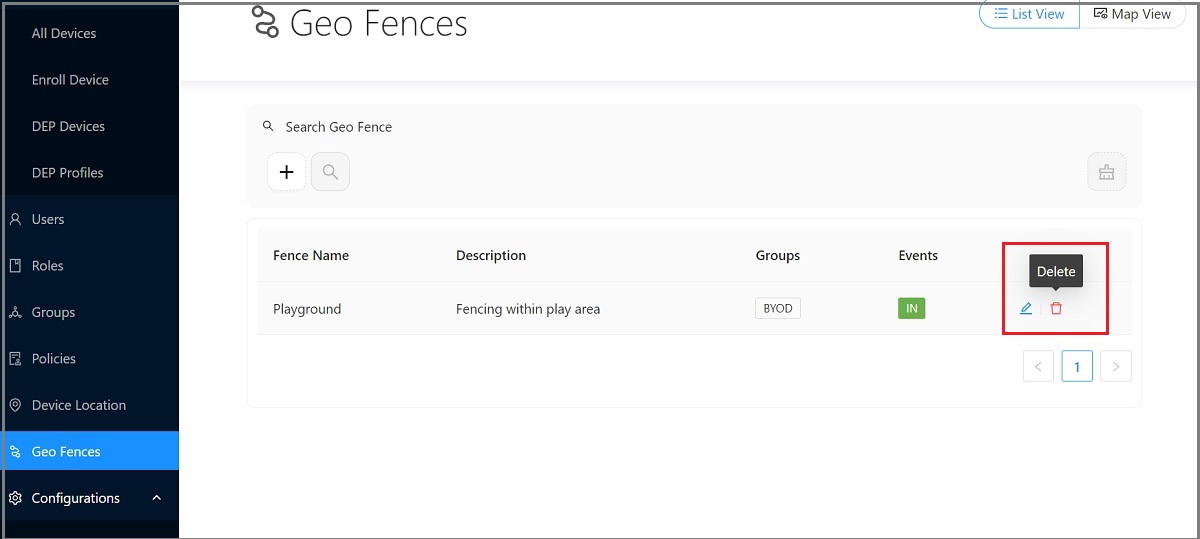
-
A dialog box will be prompted asking you to confirm that you wish to delete the record, where you can click Yes, if so.
Certficate Management
Adding Certificates
- Click Configurations.
-
Go to Certificates.
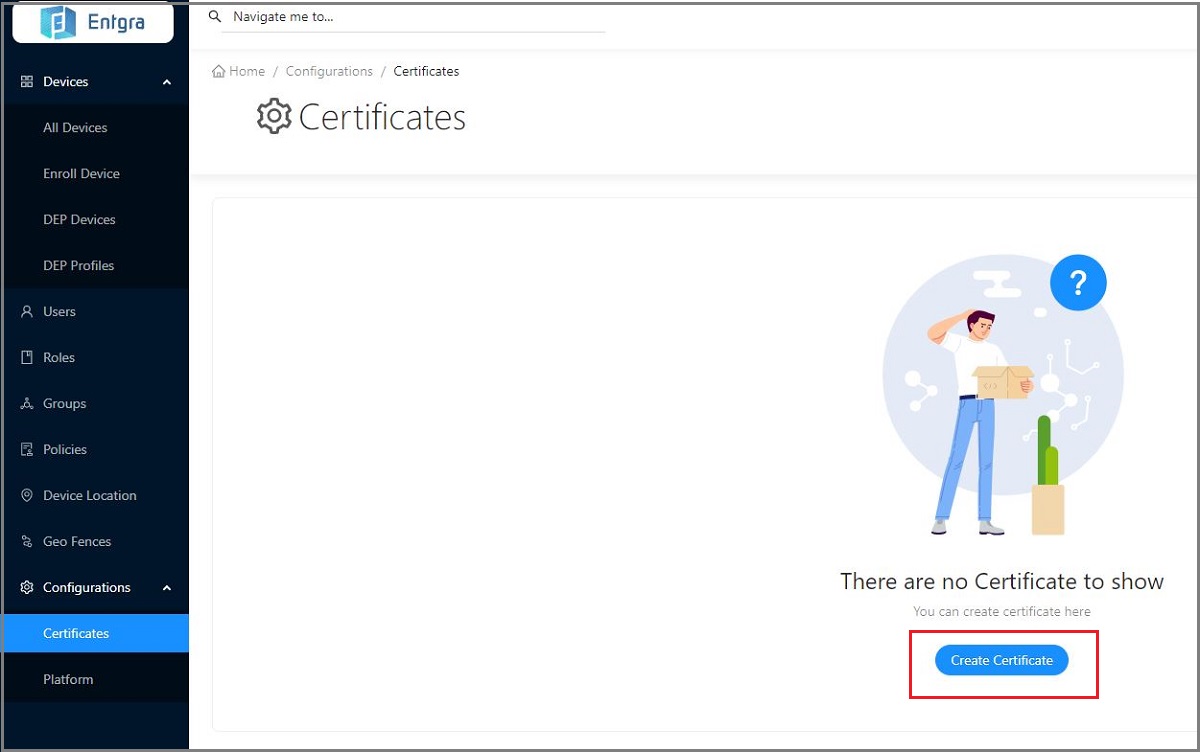
-
Enter the serial number and attach the certificate in the given fields. Click Save.
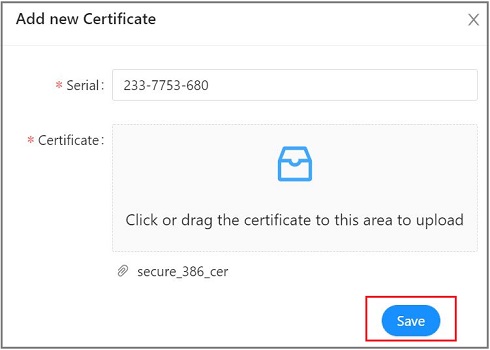
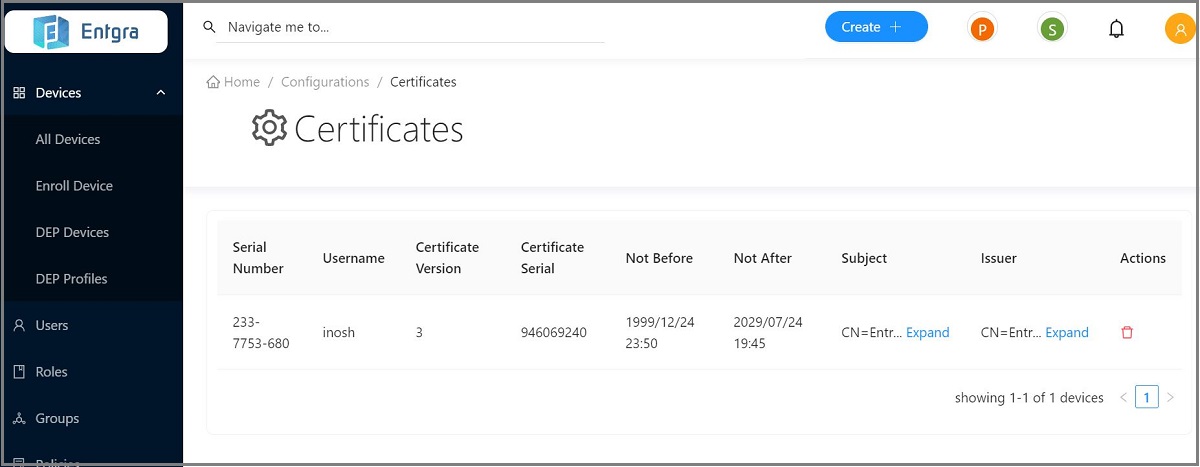
-
You are now able to view the newly created certificate in the certificates table.
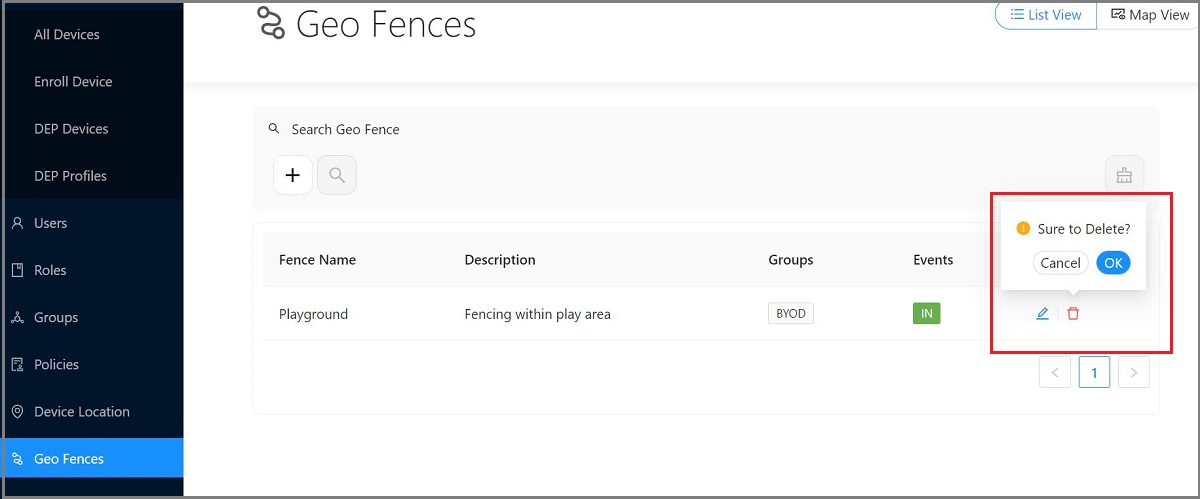
Removing Certificates
- Click Configurations.
- Go to Certificates.
- Select the certificate record that you wish to delete and click on the delete icon.
-
A dialog box will be prompted asking you to confirm that you wish to delete the record, where you can click OK, if so.
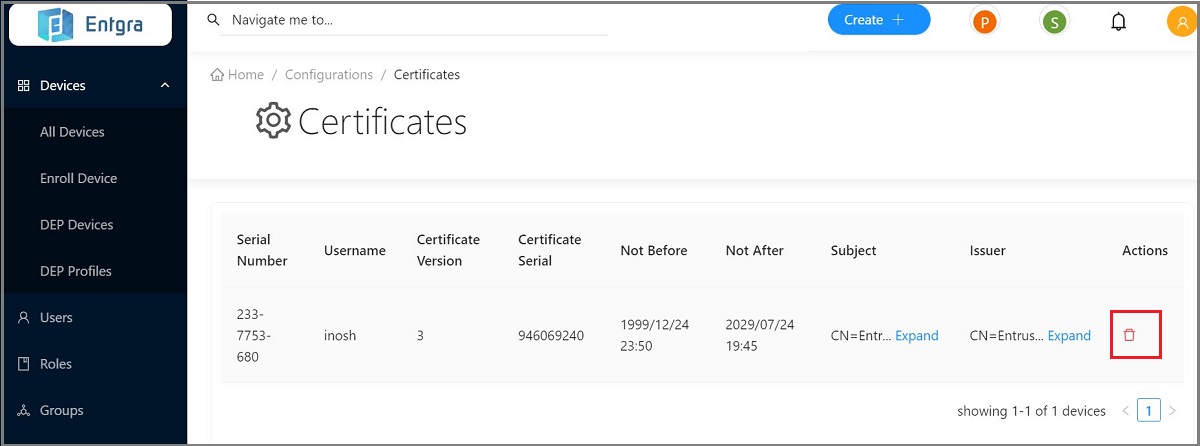
-
Your certificate record will now be deleted.
Device Location Publishing
The device location publishing feature is used for tracking the device using continuous location publishing on the Entgra UEM server. The feature is available under the general platform configurations.
By following the steps below, you can see the location being published continuously:
-
Log in to the Endpoint Management Portal.
-
Go to General Configurations under the Platform Configurations.
-
Select Location Update.
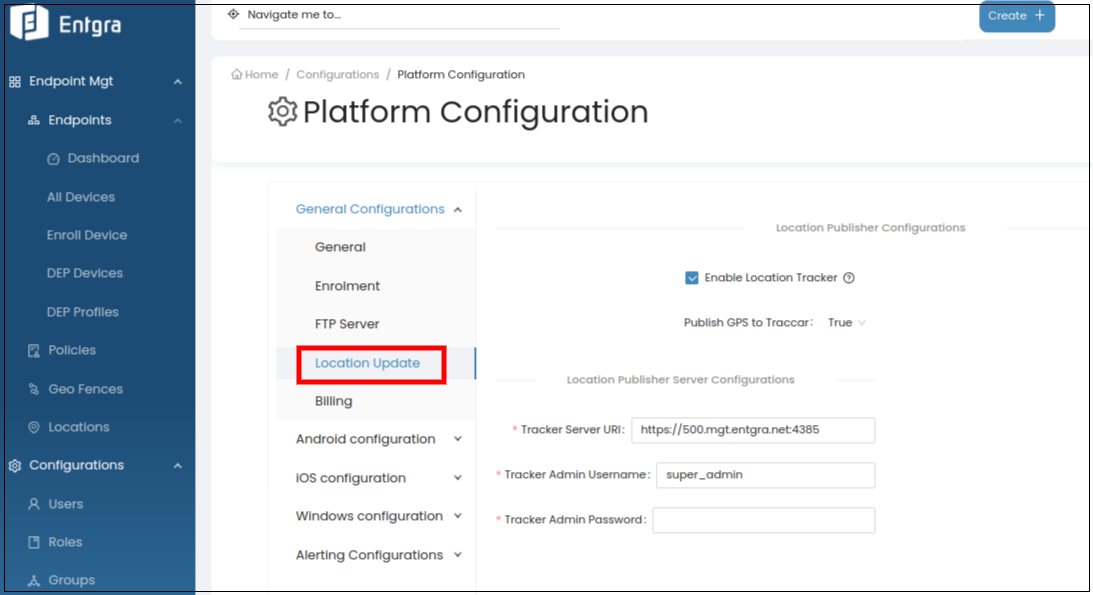
-
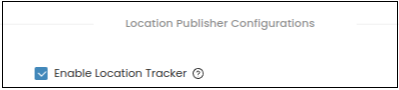
Select Enable Location Tracker check box.
-
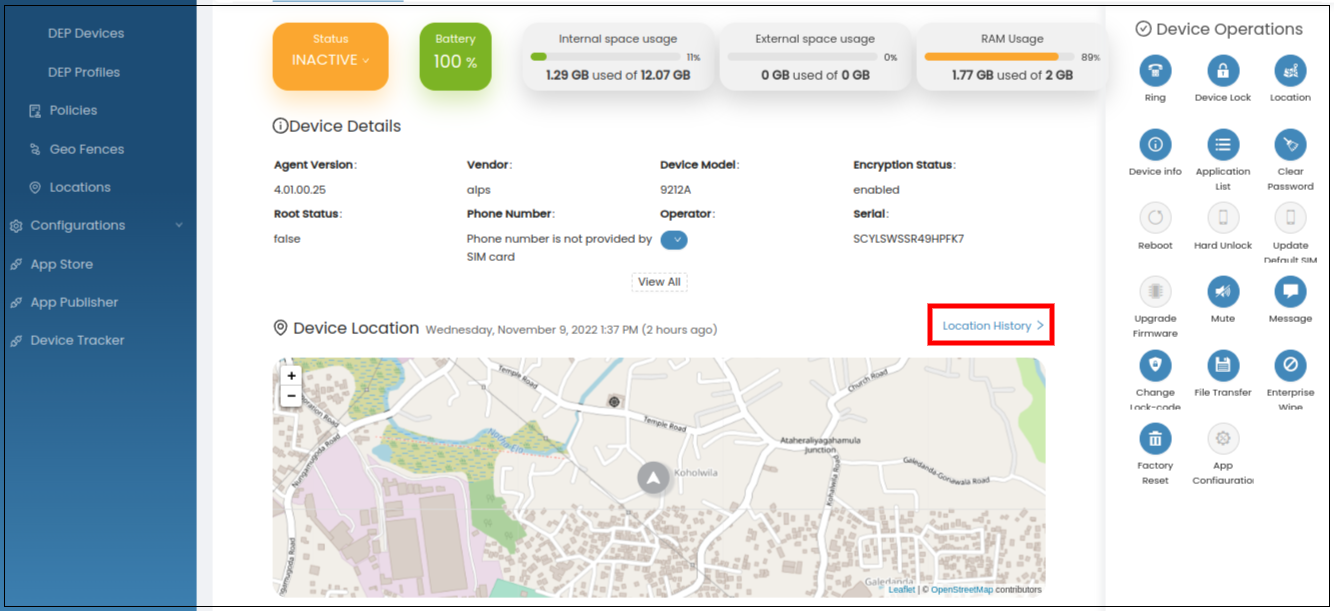
Next, enroll a device to be tracked.
-
Move the device to different locations (i.e., carry it around over to different loations).
-
In the Endpoint Management Portal, locate the device.
-
Select the Location History under Device Location.
-
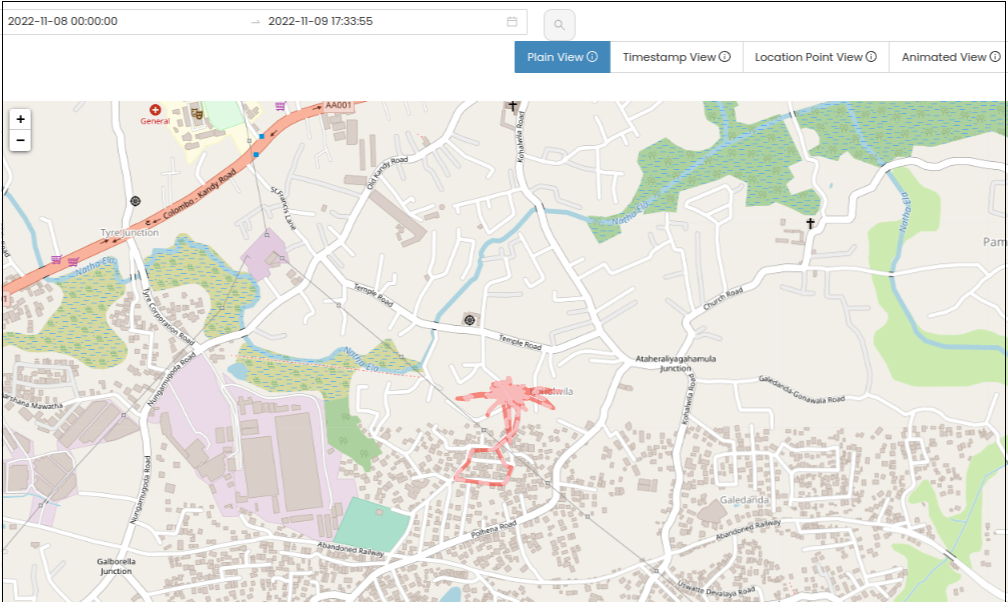
On the map view, you can see the locations that the device was moved to. The locations can also be filtered by date and time, as well by different types of views (plain view, timestamp view, location point view, animated view etc.).
There are some important points that need to be addressed to help the device send consistent location tracking data.
-
For location publishing to work consistently, location publishing permission should be configured as Allow all the time.
-
Any power saving/battery optimization configurations should be disabled.
The settings below are on different vendors about where and when the power saving configuration enables and exists:
-
Huawei: App launch (Settings > Apps > App launch)
-
Xiaomi Redmi: Auto Start
-
iPhone: Low power mode
-
Samsung: Power saving mode (Settings > Battery and device care > Battery > Limit apps and home screen)
Note: These settings may change according to the device model and the Android version.
Manage Enrolled Devices
Prerequisites
The server has to be downloaded and started.
Must have been logged on to the server's Endpoint Management Portal.
View an Enrolled Device
1.Click View under Devices.
2.You will be directed to the page with the enrolled devices.
3.Click on the Mac OS device you enrolled. You will be directed to the device details page.
Grouping Devices
This tutorial takes you through on how to group your enrolled devices. Grouping allows you to monitor and view device data of several devices at once. This way you can view any abnormal behavior of the devices at a glance and take necessary actions to prevent it.
For example, sharing the devices in your lobby with your technician. For this purpose, you can create a group named Lobby, add the devices in the lobby to the created group, and share the group with the technician. Now the technician is able to view the devices in the group, analyze the data gathered by the devices and come to a conclusion on the devices that need attention.
By default, Entgra IoT Server has a group created named Bring Your Own Device (BYOD). It groups all the devices that are owned by device users.
Let’s get started!
Add a Device Group
Start off by creating a new device group in the Entgra IoT Server:
-
Click Add under GROUPS to add a new group.
-
Provide the required details and click Add.
Group Name: Enter the group name.
Description: Enter a short description for the group.
Add Devices to the Group
Follow the steps given below to add the device/s to the group that you created:
-
Click View under GROUPS.
-
Click on the group you want to add the devices to.
-
Click Assign from My Devices.
-
Click Select to select the devices you need to add to the group and click Add to Group.
-
Select the group from the dropdown list and click Add device to group.
The groups that appear in the dropdown list are the groups you created through add a device group.
To ensure that the devices were added to the group, go to the group management page, click on the device group, and check if the devices have been added.
Sharing Groups with User Roles
You need to share the device group you created with other users so that they too can access the device type.
Follows the steps given below:
-
Download and start the server.
-
Log on to the server’s Endpoint Management Portal.
-
Click View under GROUPS.
-
Click the share icon on the group you want to share.
-
Share the groups with user roles.
-
Share the group with existing user roles by entering the role name or names and clicking Share.
-
Do you want to create a new role and share with the group? Click New Role and create the new role. Next, navigate to the group management page, click Share, enter the name of the role you just created, and click Share.
The permissions of the roles you selected will be merged to create the permissions for the new role.
-
-
If you need to add more user/s to the selected roles, select Yes in the confirmation message that appears and you are directed to the User Management screen. Else select No and you are done with sharing the group with the selected user roles.
Update Group Details
Follow the steps given below, to update the group name or description.
1.Click View under GROUPS.
2.Click Edit in your device group.
3.Update the details and click Update.
Remove a Group
Follow the steps given below, to delete a group from Entgra IoT Server.
-
Click View under GROUPS.
-
Select the group to be removed, and click Delete under the particular group.
-
Click Yes, to confirm that you want to delete the group.
Monitoring the Device Status
Due to various reasons, the devices registered with Entgra IoT Server might not be able to communicate with the server continuously. When the device is not actively communicating with the server, you need to know about it to be able take necessary actions, such as checking if the device is malfunctioning, whether it needs to be repaired, or if the device has been stolen.
To get a clear understanding, let us look at how this works in the Entgra IoT Server.
-
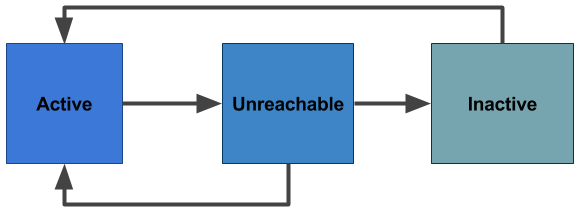
If the device and the server are actively communicating, the device is shown as Active.
- To check this, in the endpoint management console, click View under Devices. You can see all your registered devices and their device statuses.
-
If the server is unable to communicate with the device within a defined time period, the device will be displayed as Unreachable.
- In the endpoint management console, click View under Devices. You can see all your registered devices and their device statuses.
-
If the server is still unable to communicate with the device after a defined time period, the device will be shown as Inactive.
- In the endpoint management console, click View under Devices. You can see all your registered devices and their device statuses.
-
If the device starts to communicate with the device after some time, the device status is updated back to Active. The device’s status has the following lifecycle:
The device monitoring task is not applicable for all IoT devices. Therefore, you can choose to enable or disable it for your device type. Let us take a look at how you can configure Entgra IoT Server and your device type to monitor the device status.
Open the <IOTS_HOME>/conf/cdm-config.xml file and make sure the DeviceStatusTaskConfig is enabled. This configuration is enabled by default.
If the DeviceStatusTaskConfig is enabled (or enabled on a node that is in a clustered setup) it will run the status monitoring task in the server. If the configuration is disabled, the server will not monitor the status of the devices.
true
Configure the device type to go into the unreachable state and then to the inactive state after a specified time.
Navigate to the <IOTS_HOME>/repository/deployment/server/devicetype directory, open the <DEVICE_TYPE>.xml file, and configure the fields given below:
The default configuration in the android.xml file is shown below:
true 300 300 600
git
In addition to the above configurations, for the device monitoring task to actively function, you need to have pending operations on the device end. When there are pending operations the device communicates with the server to send the operation details to the server and through it, the server keeps track and ensures that the device is active.
Change Device Name
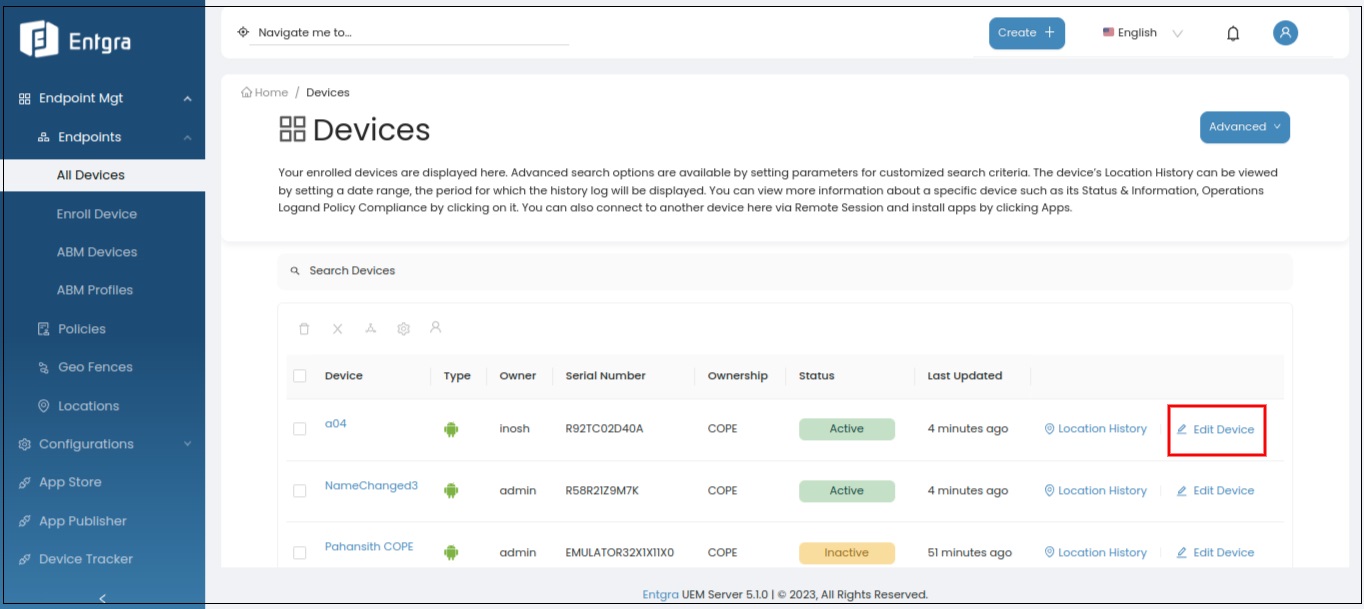
The UEM server adminstrator is able to modify device names by following the steps given below.
-
Log in to the UEM server.
-
Go to Devices, and search for the device that needs to be changed.
-
Select Edit Device to change the name of the device.
- Enter the new name for the device.

- Click Rename.
Renaming the device here triggers the SEND_USERNAME operation, and a notification is sent to the device to inform the device owner that the device name has changed. The user is able to view the changed/modified device name, if display changed device name settings have been enabled on the device.
The administrator can use a standard way to name all the devices that helps in easy identification and troubleshooting.