Android Device Management
This section takes you through on how to manage your Android device fleet. Covered within this section are:
- Android Features Summary
- Supported Operations Summary
- Android Device Operations
-
Add Operations to an Android Device
- Android Device Policy Restrictions
- Android Device Remote Control
- Android Device Information
- Android Enterprise Guide
Features
Entgra IoTS 4.0.0 is a Google Enterprise Partner for Android.
The summary list of features available Android devices is as given at the table here.
Supported Operations Summary
Entgra UEM Server facilitates one time operations that can be performed remotely via the Device Management Console. These operations are useful for runtime maintenance of devices.
The type of operations available for Android devices and are applicable for each enrollment type is summed up as per the table given here.
Applicable Policies Summary
The Policies that can be applied on an Android device depends on the way the device is enrolled with the server.
Accordingly, the table below indicates the policies applicable for each type of enrollment.
Restrictions Policies
Restriction Policies are those that can be applied on a device restricting or controlling the use of certain specific device features. There are a large number of restrictions that can be applied on an Android device.
The following table lists the available Restriction Policies for Android devices.
Android Device Operations
Add Operations to an Android Device
Android Device Policies
Android Supported Policies
Display Changed Device Name
A UEM server adminstrator is able to modify device names using APIs. This new features also enables a user to notice the changed/modified device name.
In order to be able to view the changed device name, follow the steps below:
-
Go to Entgra Device Management Agent in the device.
-
Click Agent information.
-
Under Device Name, the changed device name is shown.
Device display orientation
Data Keys of Policy and Descriptions
| Data Key | Description |
|---|---|
| Device display orientation | The display orientation of device can be set in a fixed mode. * Auto, * Potrait, * Landscape |
Refer to Publish a Policy for instructions on how to publish a new policy in an Android device.
App Install Policy (Work profile only)
App Initial Install Mode
The auto install mode for the first time
-
Auto install once only when enrolling
-
Do not install automatically
-
Auto install even if uninstalled manually
Priority level when installing the app
Priority level when installing the app among many other apps
- Lowest - Highest
Device charging state when installing apps
Device charging state when installing apps
-
Device must be charging
-
Device does not need to be charging
Device processor state when installing
-
Device does not need to be idling
-
Device does not need to be idling
Device network state when installing
Device processor state when installing
-
Device can be in any network
-
Device must be in an unmetered network
Refer to Publish a Policy for instructions on how to publish a new policy in an Android device.
Android Device Information
This section explains about the Device Infomation which can be seen in an Android Device.
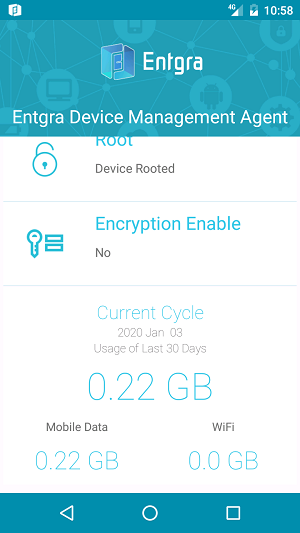
Android Data Usage
This feature enables the measure of data usage of the devices over the last 30 days. It distinctly measures the usage of Mobile data and WiFi separately. The users can view this under the Device Information of the Agent.
 .
.
Android Enterprise Guide
What is Android Enterprise?
Android enterprise allows EMMs to integrate with Google Play and make the enrollment and management of your mobile devices and apps much easier. Android enterprise offers some unique enrollment flows which allows enterprises to gain full control over devices using Fully Managed and Dedicated Device enrollments.
Configure Android Enterprise
Before you start using the capabilities of Android enterprise, there is a configuration step that enables Entgra to connect to Google Enterprise. This step will allow Entgra to manage your device uniquely to your enterprise. In more technical terms, Entgra requires a special token to talk to Google APIs (known as ESA) and a unique enterprise ID to identify your organisation and its devices and apps uniquely.
The steps below will enable you to get these tokens:
Before we begin
-
Get an access token from Entgra. This token provided by Entgra is only valid for a period of 1 hour. Therefore, please make sure to mention the time that you are planning to perform these steps. This is a token that gives you access to start the onboarding process which will allow you to register a new enterprise ID and a token from Google known as ESA.
a. If you are using Entgra EMM cloud, create a new ticket in the support system with the following title Requesting a token for Android Enterprise Onboarding. In the description, please mention the time window you are planning to perform the onboarding steps. Example: We are planning to configure at 9AM EST on 24/02/2021.
b. If you are using the on-premises version, please send an email to biz-dev@entgra.io with the following subject Requesting a token for Android enterprise onboarding. In the body, please mention the time window you are planning to perform the onboarding steps. Example: We are planning to configure at 9AM EST on 24/02/2021.
-
You will need a Google account which is dedicated to EMM related work. We recommend creating a new Google account (a free account). Please keep this account details securely as this will be having administrative rights over your enterprise account.
-
If you have any other Google accounts you have signed in using your browser, please open a private browser window and sign in to your new Google account.
-
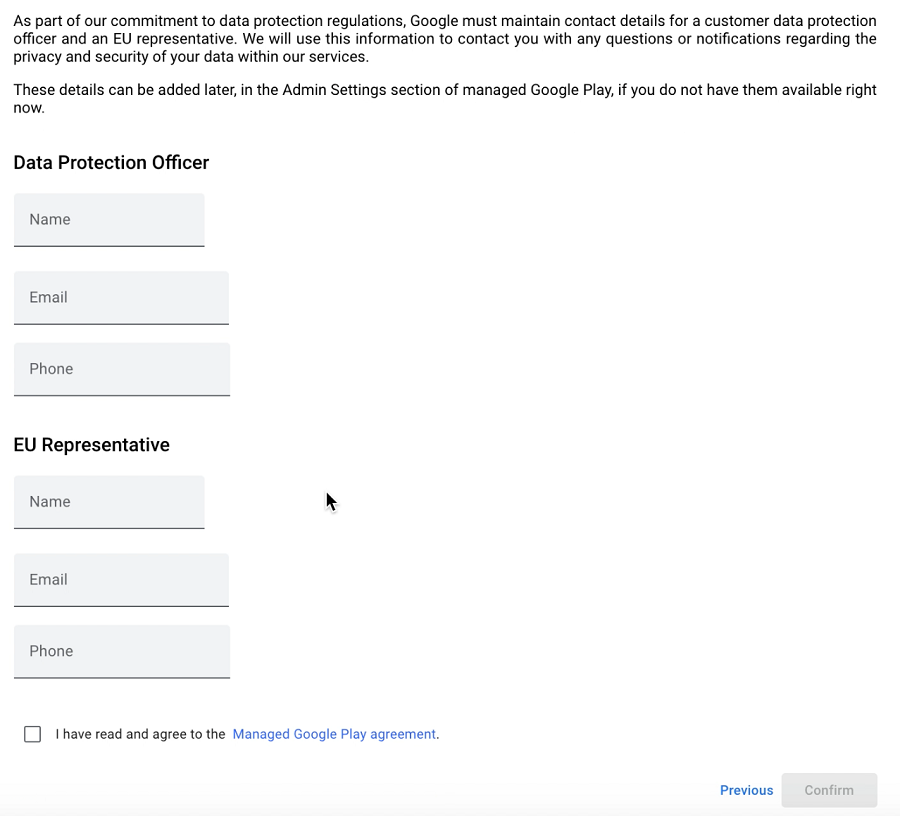
Before you begin, please note that during the onboarding process, you will be prompted to provide your organization name and fill the following form. Filling this form is optional based on your countries regulations such as GDPR. Also note that agreeing to the managed Google Play agreement at the bottom of this form is mandatory. Please review this prior to starting the onboarding process.
Configuration Steps
-
On the Android Platform Configurations, Go to Android For Work section as shown in the bellow image.
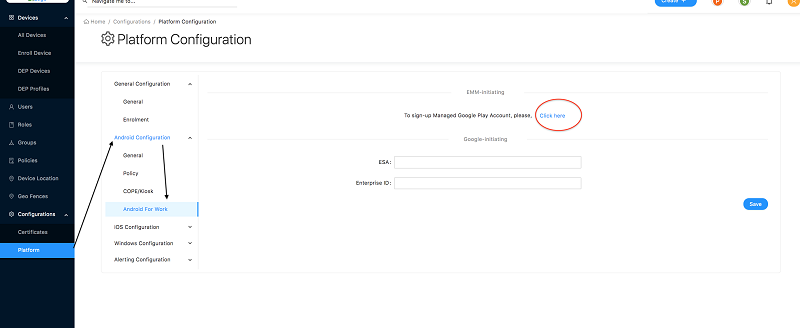
-
Under EMM initiating section, click here.
-
A popup will be displayed as below. Enter the token you received from Entgra and click OK.
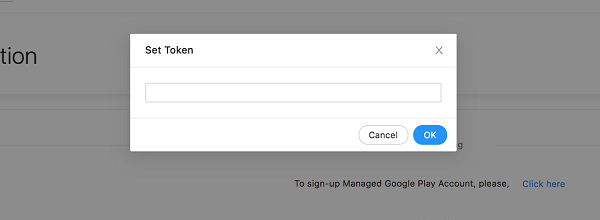
-
You will be redirected to Google’s Enterprise onboarding page where you are required to provide your organisation name.
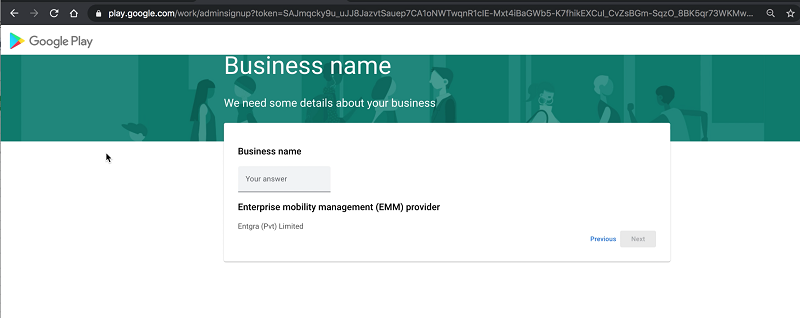
-
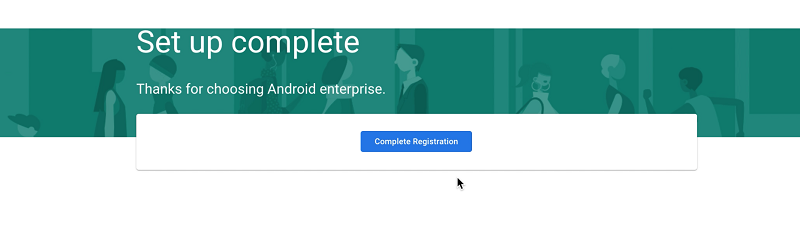
Fill the form and click Confirm. On the next screen that appears, click Complete registration.
-
You will be redirected to the platform configuration page. Stay on this page until you see the following notification on the top right corner that shows the end of successful completion of configurations.
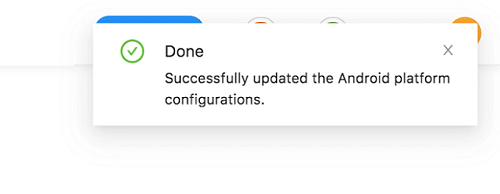
Now the link between Entgra EMM and your new enterprise is established successfully! We have everything we need to start importing applications from Google Play store to the EMM server.
Importing Apps from Google Play Store
Although EMM server can now communicate with Google Play store, we need to define the exact apps that are to be imported to the EMM server. Importing the apps you need to EMM will bring all the icons, screenshots from Google Play Store to the EMM publisher portal, which will enable installing the same on devices. This import process allows you to import public apps on Play Store such as Gmail or facebook to the EMM publisher portal.
Steps
-
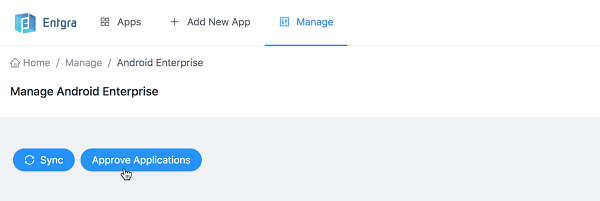
Go to the publisher portal and hover over the Manage menu and click Android Enterprise.

-
Next, click Approve applications.

-
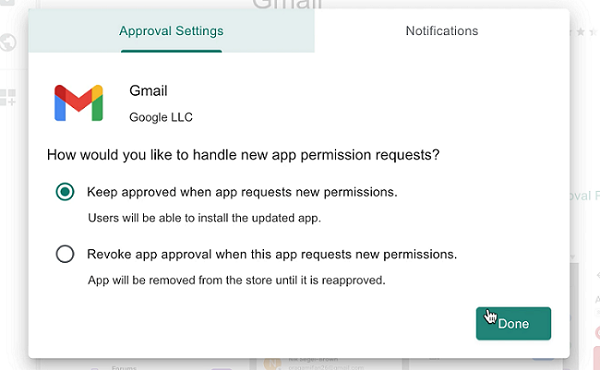
Now you will get a popup with the Google Play store where you can search for any application that you wish to import to the EMM server. Example: Gmail.

-
Click Approve and you may need to approve the permissions for this application.
-
Click Done and close the popup windows.
-
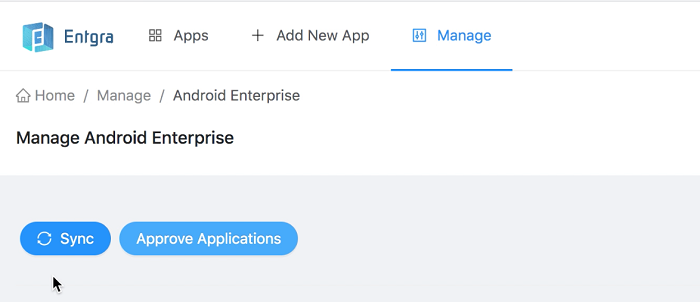
Finally, click Sync to fetch all the approved applications to the EMM portal and automatically move them to the published state.
Authorize Devices to Install Apps
With Android enterprise, the EMM server plays a facilitator role or simply a UI where commands can be sent to Google. The actual app installation is done by the Google Play store. Therefore instructions must be given to Google Play store and allow the devices in EMM to be granted permission to install on devices.
There are 2 steps to achieve this:
- Define the Play Store layout
- Define which apps are allowed on which devices
Define the Play Store Layout
As shown in the enrollment using Android enterprise, a device that gets onboarded will get a Google account added to them. This means that there will be a Google Play store access to the specified user via the Play Store app on the device. As part of the authorization process, it is required to define how the apps were allowed to be available on the device and become visible to the user. In other words, we need to define the layout of the Google Play store app that becomes visible to the end user.
There are few parts in the Play Store app layout:
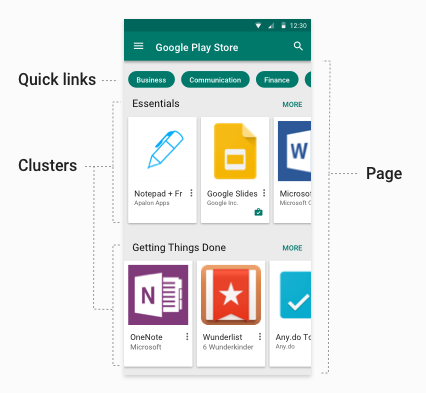
- Page - A Page consists of a set of app clusters. The page is vertically scrollable
- Cluster - A cluster is a group of alls that are categories according to some logical need. Example: Business apps cluster, entertainment apps cluster, etc. A cluster resides in a page and a cluster is horizontally scrollable.
- Quick Links - These appear at the top of every page and these are links to other pages
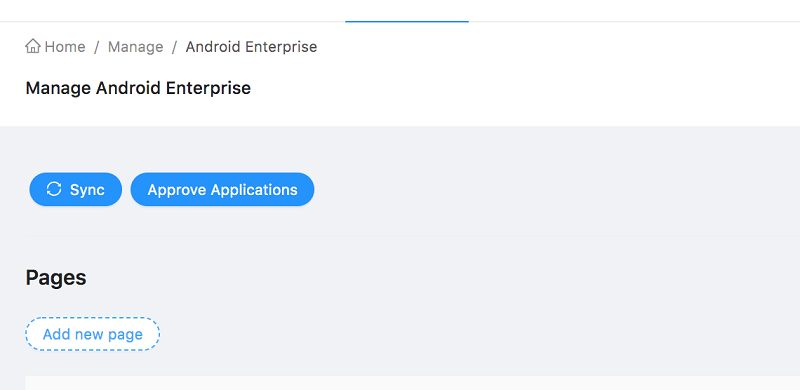
Create a Page
- Go to the publisher portal and hover over Manage menu and click Android Enterprise.
-
Click Add new page.
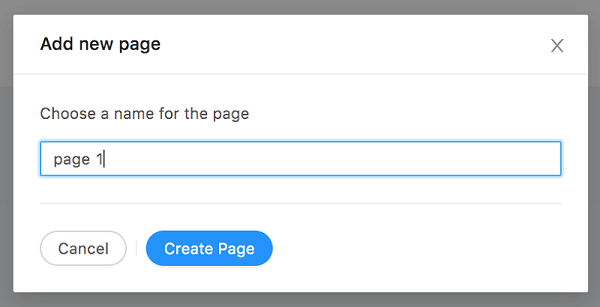
-
Enter a name for the page and click Create Page.
-
In the pages list, click set as homepage to mark this new page as the first page in the Play Store.

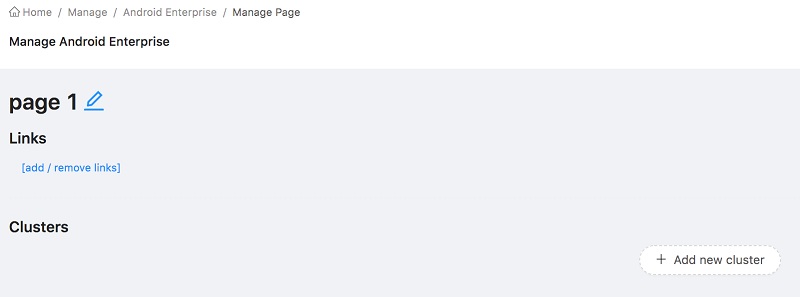
Create a Cluster
- Selet a page from the list of pages, at the page list created earlier.
-
Click Add new cluster.
-
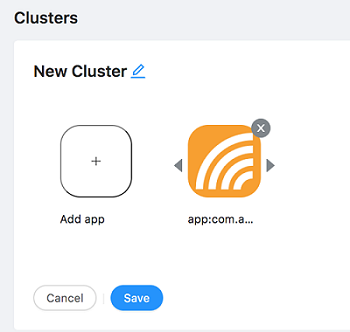
To name the cluster, click on the edit icon next to text New cluster.
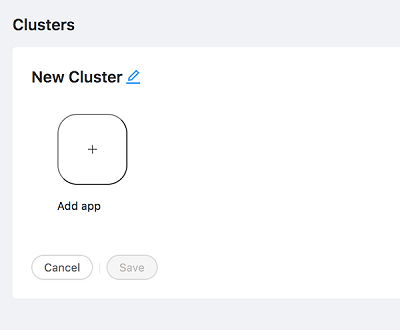
-
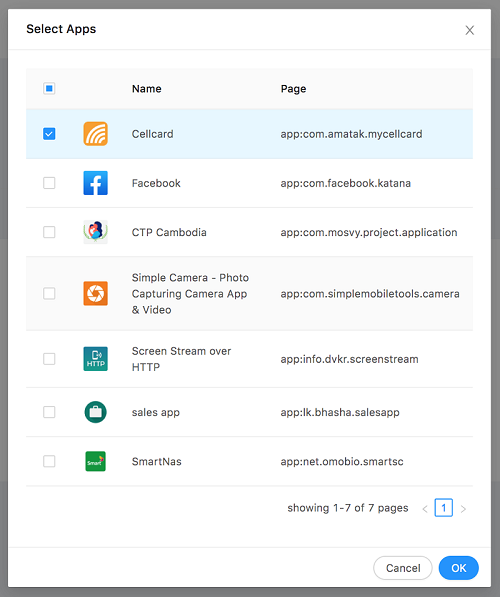
To add an app to the cluster, click Add app and select the app you wish to add from the popup and click OK.
-
Click Save to save the cluster.
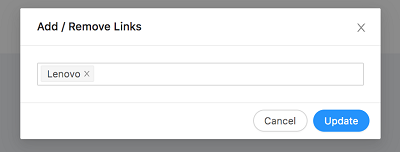
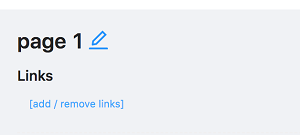
Create/Remove Quick Links
You can link multiple pages together by adding links to a page. Alternatively, follow the same procedure to remove already existing links from pages.
- Click on a page from the page list, that was created in the Create a Page step.
-
Click Add/remove links.
-
From the pop-up, add or remove pages to create/remove links and click Update.